WikiSysop
Bold text
Italic text
TT Code
<html>
  <head></head>
  <body></body>
</html>
Test test
Tab 1 has some text
Tab 2 has some text too
<multistep> Step 1= We can have lots of fun |-| Step 2= There's so much we can do </multistep>
Modèle:Editgrn openHighlighted textModèle:Editgrn close
Heading 1
Heading 2
Heading 3
Heading 4
Heading 5
- Bulleted list item
- Bulleted list item
- Bulleted list item
- Bulleted list item
- Bulleted list item
- Numbered list item
- Numbered list item
- Numbered list item
- Numbered list item
- Numbered list item
- Numbered list item
- Bulleted list item
- Indented line
http://nowikiformattinghere.com
Regular text Big text
Regular text Small text
Regular text Superscript text
Regular text Subscript text
| header 1 | header 2 | header 3 |
|---|---|---|
| row 1, cell 1 | row 1, cell 2 | row 1, cell 3 |
| row 2, cell 1 | row 2, cell 2 | row 2, cell 3 |
About Genesys Co-browse
Find out about the core features of Genesys Co-browse.
Deploy Genesys Co-browse
Find procedures to set up Genesys Co-browse.
Genesys Co-browse Reporting Templates
Find templates for real-time and historical reporting.
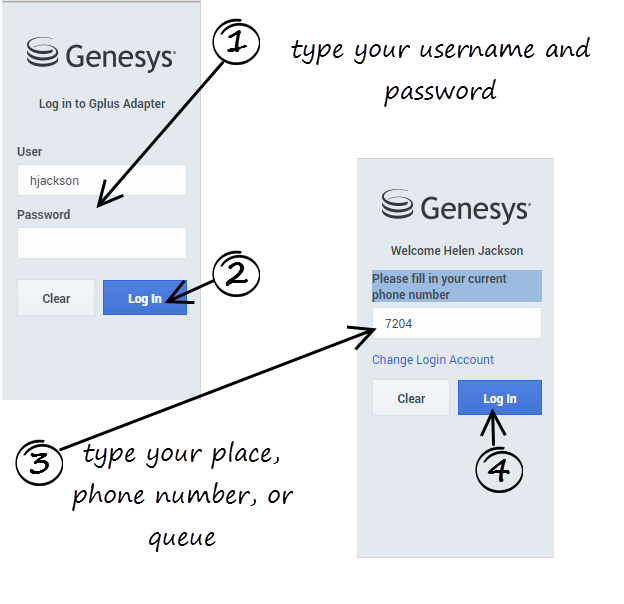
If you are prompted to log in, enter your Genesys username (such as an email address) and password and click Log In. If you have logged in before, your username should already be entered for you.
Depending on how your administrator has configured the adapter, you might also see a secondary login page where you're prompted to enter the name of a place, a phone number, or enter a queue.
If you have logged into the Adapter before, the login page automatically inputs your last known place. Most often, you can accept the last known place. If you have changed your place, phone number, or queue, you must update the field before you click Log In.
Changing Your Password
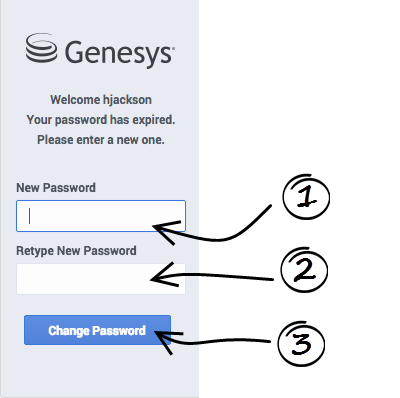
If your password has expired, you are prompted to change your password.
If needed, contact your administrator for password rules.
Procédure : Modifying the Styling of the Chat Messages
Purpose: Customization Type: CSS-based
In this example we play with the styling of the messages that appear in the chat widget. This should give you a taste of what a CSS-based customization might look like.Prerequisites
- You must have basic knowledge of CSS and HTML.
Étapes
- Launch a web page that is instrumented with the chat widget.
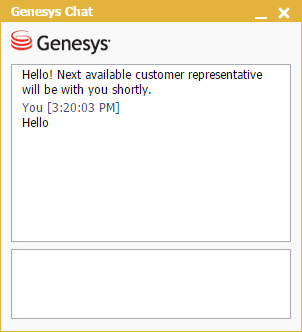
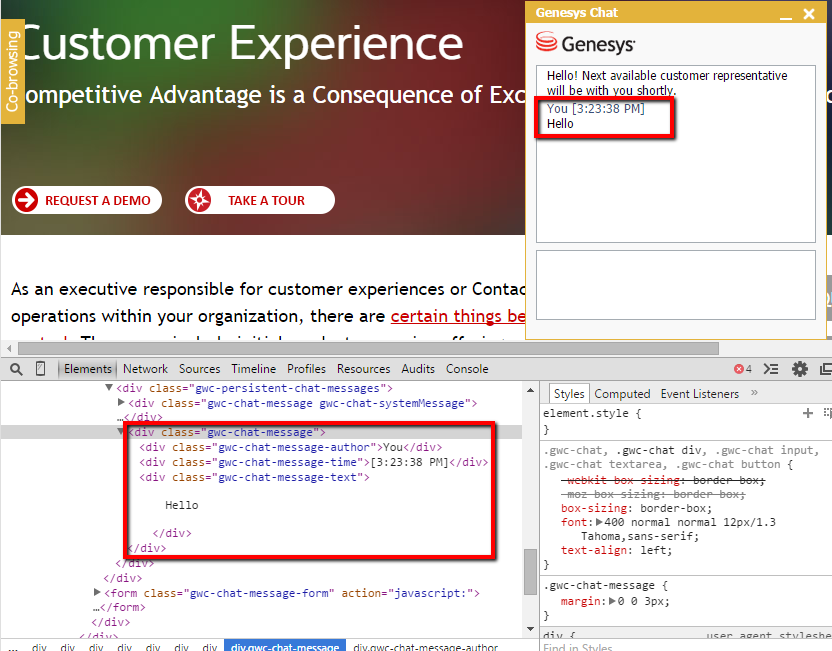
- Start a chat session and send a chat message. You will see something like this:
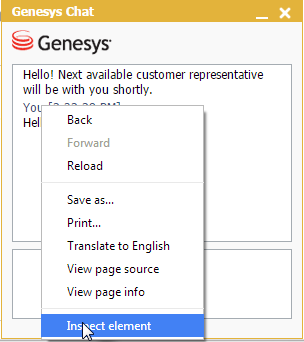
- Right-click the message and choose "Inspect Element" to start the Chrome developer tools.
We can see that the chat message consists of three elements, each with its own dedicated CSS class. We will use this information to create new styling for these elements.
- Next, we create our custom CSS to modify the colors of some of the text and the font used for the author name.
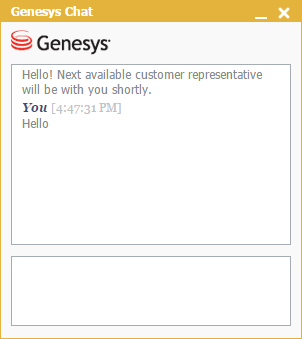
/* 1. Make the name stand out */ div.gwc-chat-message-author { font-family: Georgia; font-style: italic; font-weight: bold; } /* 2. Make the date more subtle */ div.gwc-chat-message-time { font-family: Georgia; color: #bdc3c7; } /* Make the body of a message a bit less contrast */ div.gwc-chat-message-text { color: #7f8c8d; } - Add this CSS to your web page.
- Reload the page. The chat message has the new look and feel we defined in the CSS.

