|
|
| Ligne 1 : |
Ligne 1 : |
| − | =Fenêtre principale= | + | =Main Window= |
| − | {{#anc:Main Window}}
| + | ['''Modified:''' 8.5.109.16] |
| − | ['''Modifié :''' 8.5.109.16] | |
| | | | |
| − | ['''Modifié :''' 8.5.108.11] | + | ['''Modified:''' 8.5.108.11] |
| | | | |
| − | ['''Modifié :''' 8.5.104.15] | + | ['''Modified:''' 8.5.104.15] |
| | | | |
| | __NOTOC__ | | __NOTOC__ |
| − | Depuis la fenêtre principale, vous pouvez effectuer les opérations suivantes :
| + | The Main Window enables you to: |
| | {{AnchorDiv|ManageYourStatus}} | | {{AnchorDiv|ManageYourStatus}} |
| − | <toggledisplay linkstyle font-size:larger showtext="[+] Gestion de votre état" hidetext="[-] Gestion de votre état"> | + | <toggledisplay linkstyle font-size:larger showtext="[+] Manage your status" hidetext="[-] Manage your status"> |
| − | {{#anc:Manage Your Status}}
| + | ==Manage Your Status== |
| − | ==Gestion de votre état==
| + | ['''Modified:''' 8.5.108.11] |
| − | ['''Modifié :''' 8.5.108.11] | |
| | | | |
| − | Vous pouvez gérer votre état à partir de deux éléments de la fenêtre principale :
| + | You can manage your status from two places in the Main Window: |
| | | | |
| − | * [[Main_Window#Global_Status_Icon|Menu d'état global]] | + | * [[Main_Window#Global_Status_Icon|Global Status menu]] |
| − | * [[My_Status#My_Channels_Tab|Onglet Mes canaux]] | + | * [[My_Status#My_Channels_Tab|My Channels tab]] |
| | | | |
| − | {{#anc:Global Status Menu}}
| + | ===Global Status Menu=== |
| − | ===Menu d'état global=== | |
| | | | |
| − | La barre de titre de la fenêtre principale affiche l'icône d'état global et votre état connecté. Vous pouvez utiliser le menu '''Etat global''' pour connecter ou déconnecter vos canaux.
| + | The title bar of the Main Window displays your global status icon and your logged in status. You can use the '''Global Status''' menu to log on and off of your channels. |
| | | | |
| − | Cliquez sur l'[[My_Status#Global_Status_Icon|icône d'état global]] (voir illustration) sur la barre de titre de la fenêtre principale pour ouvrir le menu '''Etat global'''.
| + | Click the [[My_Status#Global_Status_Icon|Global Status icon]] (see figure) on the Main Window title bar to open your '''Global Status''' menu. |
| | | | |
| − | [[Image:IWStatusMenu_850.png|thumb|center|Menu d'état global]] | + | [[Image:IWStatusMenu_850.png|thumb|center|Global Status Menu]] |
| | | | |
| − | Placez le pointeur de la souris sur l'[[My_Status#Global_Status_Icon|icône d'état global]] pour consulter le résumé de votre état.
| + | Place the mouse pointer over the [[My_Status#Global_Status_Icon|Global Status icon]] to view your status summary. |
| | | | |
| − | [[Image:IW_Status_Icon_Hover_850.png|thumb|center|Survol de l'icône d'état à l'aide du pointeur]] | + | [[Image:IW_Status_Icon_Hover_850.png|thumb|center|Hovering pointer over the Status Icon]] |
| | | | |
| − | Le résumé de l'état comprend le nom de connexion, la place, les canaux et l'état de ces derniers.
| + | The status summary includes your login name, place, channels, and channel status. |
| | | | |
| − | Si vous êtes connecté à plusieurs canaux, l'état détaillé de chacun d'entre eux est affiché ; sinon, seul l'état Prêt est affiché.
| + | If you are logged in to more than one channel, detailed status for each channel is displayed; otherwise, only your Ready state is displayed. |
| | | | |
| − | L'état Prêt est également affiché dans l'onglet [[My_Status#My_Channels_Tab|Mes canaux]] de la fenêtre principale. Vous pouvez gérer votre état et transférer des interactions depuis l'onglet Mes canaux.
| + | Your Ready status is also displayed in the [[My_Status#My_Channels_Tab|My Channels]] tab of the Main Window. You can manage your status and forward interactions from the My Channels tab. |
| | | | |
| − | {{#anc:Not Ready Status}}
| + | ===Not Ready Status=== |
| − | ===Etat Non prêt===
| |
| | | | |
| − | Lorsque vous traitez une interaction, le système interrompt l'affichage de la durée dans l'état en cours.
| + | When you are handling an interaction, the system interrupts the display of the amount of time that you are in the current state. |
| | | | |
| − | Si vous définissez votre état sur Non prêt, Non prêt - ''<raison>'', ou Traitement post-appel (ACW) pendant le traitement d'une interaction pour un canal donné, le système n'affiche pas la durée dans l'état en cours tant que l'interaction n'est pas terminée. Cette fonctionnalité permet d'afficher votre temps de pause ou ACW en fonction des statistiques enregistrées.
| + | If, while you are handling an interaction for a given channel, you set your status to either Not Ready, Not Ready - ''<reason>'', or After Call Work (ACW) the system does not display the amount of time that you are in that state until the interaction is complete. This feature enables your break or ACW time to be displayed according to recorded statistics. |
| | | | |
| − | {{#anc:Logoff/Logon Channels}}
| + | ===Logoff/Logon Channels=== |
| − | ===Déconnexion/connexion des canaux===
| + | ['''Modified:''' 8.5.108.11] |
| − | ['''Modifié :''' 8.5.108.11] | + | You can use the '''Global Status''' menu to log on to all channels that are logged off, or to log off from all channels without logging out. You can use the [[My_Status|My Channels]] tab to log on and log off individual channels. |
| − | Vous pouvez utiliser le menu '''Etat global''' pour vous connecter à tous les canaux déconnectés ou pour déconnecter tous les canaux sans vous déconnecter. Vous pouvez utiliser l'onglet [[My_Status|Mes canaux]] pour connecter et déconnecter des canaux individuels.
| |
| | | | |
| − | [[File:IW_851_Logon_To_All_Channels_Ready_Status_Menu.png|thumb|center|Cliquez sur le menu Etat global et sélectionnez Connexion pour vous connecter à tous les canaux déconnectés]] | + | [[File:IW_851_Logon_To_All_Channels_Ready_Status_Menu.png|thumb|center|Click the Global Status menu and select Log On to log on to all logged off channels]] |
| | | | |
| − | Pour déterminer quels canaux sont connectés ou déconnectés, ouvrez l'onglet Mes canaux ou faites glisser le pointeur de la souris sur l'icône d'état global.
| + | To see what channels are logged on or off, either open the My Channels tab or hover your mouse pointer over the Global Status icon. |
| | | | |
| − | [[File:IW_851_Channels_Logged_Off.png|thumb|center|Vous pouvez utiliser l'onglet Mes canaux ou l'icône d'état global pour déterminer quels canaux sont connectés ou déconnectés]] | + | [[File:IW_851_Channels_Logged_Off.png|thumb|center|You can use the My Channels tab or the Global Status icon to determine which channels are logged on or off]] |
| | | | |
| − | {{#anc:Inactivity Timeout}}
| + | ===Inactivity Timeout=== |
| − | ===Délai d'inactivité=== | |
| | | | |
| − | [[Activity_Timeout|Le délai d'inactivité]] est une fonctionnalité de sécurité qui verrouille les fenêtres Workspace sur votre station de travail, si vous n'utilisez pas votre souris ou votre clavier durant une période définie par votre administrateur. Vous devez vous authentifier pour réactiver Workspace. | + | [[Activity_Timeout|Inactivity Timeout]] is a security feature that locks the Workspace windows on your workstation if you do not use your mouse or keyboard for a period of time that is defined by your administrator. You must authenticate to reactivate Workspace. |
| | </toggledisplay><br> | | </toggledisplay><br> |
| | {{AnchorDiv|ManageYourSettingsAndPreferences}} | | {{AnchorDiv|ManageYourSettingsAndPreferences}} |
| − | <toggledisplay linkstyle font-size:larger showtext="[+] Gestion de vos paramètres et préférences" hidetext="[-] Gestion de vos paramètres et préférences"> | + | <toggledisplay linkstyle font-size:larger showtext="[+] Manage your settings and preferences" hidetext="[-] Manage your settings and preferences"> |
| − | {{#anc:Manage Your Settings and Preferences}}
| + | ==Manage Your Settings and Preferences== |
| − | ==Gestion de vos paramètres et préférences==
| |
| | {{AnchorDiv|ManageSettingsPrefs}} | | {{AnchorDiv|ManageSettingsPrefs}} |
| − | Cliquez sur l'icône Agent ([[Image:IWMainMenu_850.png|link=]]) pour ouvrir le menu principal. C'est à partir de ce menu que vous contrôlez vos paramètres et définissez vos préférences.
| + | Click the Agent icon ([[Image:IWMainMenu_850.png|link=]]) to open the Main Menu. You control your settings and set your preferences from the Main Menu. |
| | | | |
| − | Le menu principal contient tout ou partie des fonctions ci-après, selon la configuration de votre compte effectuée par l'administrateur système :
| + | The Main Menu contains some or all of the following functions, depending on how your account is configured by your system administrator: |
| | | | |
| | <!--* '''Switch to Gadget'''—Toggles between the Main Window view and the [[Gadget|Gadget view]]--> | | <!--* '''Switch to Gadget'''—Toggles between the Main Window view and the [[Gadget|Gadget view]]--> |
| − | * '''Afficher l'outil de statistiques''' : permet d'afficher la [[Statistics_Gadget|vue Outil de statistiques]]. | + | * '''Show Statistics Gadget'''—Displays the [[Statistics_Gadget|Statistics Gadget view]] |
| − | * '''Fenêtre principale toujours au premier plan''' : permet de toujours afficher la fenêtre principale par-dessus les autres fenêtres qui s'ouvrent sur votre Bureau. | + | * '''Main Window Always on Top'''—Keeps the Main Window on top of any other window that opens on your desktop |
| − | * '''Masquer automatiquement la fenêtre principale''' : masque la fenêtre principale en haut de l'écran uniquement lorsque la fenêtre principale de Workspace est ancrée. | + | * '''Auto-Hide the Main Window'''—Hides the Main Window at the top of the display only when the Workspace Main Window is docked. |
| − | * '''Affiner les informations de place'''/'''canal''' : permet d'afficher la [[Login#Step_Two|vue Paramètres de connexion avancés]] pour modifier les paramètres du canal auquel vous êtes connecté. | + | * '''Refine Place''' / '''Channel information'''—Displays the [[Login#Step_Two|Advanced Login Parameters view]] to change your logged-in channel parameters |
| − | * '''Changer de thème''' : permet de sélectionner une autre apparence prédéfinie dans le menu Thème. | + | * '''Change Theme'''—Selects a different predefined appearance from the Theme menu |
| − | * '''Zoom''': permet de spécifier le niveau de zoom des zones de texte et des transcriptions.[[File:IW_851_Zoom_Control.png|thumbnail|center|Commande du curseur de zoom dans le menu principal]]Cette option s’applique aux vues suivantes : ['''Ajouté :''' 8.5.109.16] | + | * '''Zoom'''—Enables you to specify the zoom level of text fields and transcripts.[[File:IW_851_Zoom_Control.png|thumbnail|center|Zoom slider control in the Main Menu]]This feature applies to the following views:['''Added:''' 8.5.109.16] |
| − | ** [[Internal_IM|MI]] (entrée texte, transcription et infobulle de données d'interaction) | + | ** [[Internal_IM|IM]] (text entry, transcript, and interaction data tooltip) |
| − | ** [[Chat_Tasks_Overview|Chat]] (entrée texte, transcription et infobulle de données d'interaction) | + | ** [[Chat_Tasks_Overview|Chat]] (text entry, transcript, and interaction data tooltip) |
| − | ** [[E-Mail_Interaction|E-mail]] (entrée texte et vue par e-mail entrant) | + | ** [[E-Mail_Interaction|Email]] (text entry and inbound email view) |
| − | ** [[SMS_Interaction|SMS]] (entrée texte, transcription et infobulle de données d'interaction) | + | ** [[SMS_Interaction|SMS]] (text entry, transcript, and interaction data tooltip) |
| − | ** [[Call_History|Historique de l’interaction]] (MI, chat, e-mail et SMS) | + | ** [[Call_History|Interaction history]] (IM, Chat, Email, and SMS) |
| − | ** [[Responses|Réponses standard]] | + | ** [[Responses|Standard responses]] |
| − | ** [https://docs.genesys.com/Documentation/IW Social media] (entrée texte uniquement) | + | ** [https://docs.genesys.com/Documentation/IW Social media] (text entry only) |
| − | * '''Vérifier et mettre à jour''' : permet de vérifier s'il existe des mises à jour de Workspace et, le cas échéant, de mettre à jour le logiciel. | + | * '''Check and Update'''—Checks for updates to Workspace, and updates your software if an update is available |
| − | * '''Modifier le mot de passe''' : affiche la boîte de dialogue [[Login#Change_Your_Password|Modifier le mot de passe]]. | + | * '''Change Password'''—Displays the [[Login#Change_Your_Password|Change Password]] dialog box. |
| − | * '''Quitter''' : permet de se déconnecter de tous les canaux et de fermer l'application. | + | * '''Exit'''—Logs off all channels and closes the application |
| | | | |
| − | {{NoteFormat|Pour les agents malvoyants, votre administrateur peut configurer le système de manière à faire apparaître le thème Workspace à contraste élevé dans le menu '''Changer de thème'''. Ce thème est conçu pour répondre aux exigences des directives sur l'accessibilité du contenu Web (WCAG) 2.0, avec certaines limites. Il se peut que ce thème vous soit déjà accessible.|1}} | + | {{NoteFormat|For visually impaired agents, your administrator can configure the system to make the Workspace High Contrast theme available to you in the '''Change Theme''' menu. This theme is designed to meet the requirements of the Web Content Accessibility Guidelines (WCAG) 2.0 requirements, with some limitations. This theme might already be available to you.|1}} |
| | | | |
| − | Cliquez sur l'icône d'aide ([[Image:IW_Help_Icon_850.png|link=]]) pour lancer ce document d'aide ou sur le menu déroulant Aide pour lancer ce document d'aide ou obtenir des informations sur Workspace.
| + | Click the Help icon ([[Image:IW_Help_Icon_850.png|link=]]) to launch this help document or click the Help drop-down menu to launch this help document or get information about Workspace. |
| | | | |
| − | {{#anc:Docking the Main Window}}
| + | ==Docking the Main Window== |
| − | ==Ancrage de la fenêtre principale==
| |
| | | | |
| − | Vous pouvez utiliser la fenêtre principale de Workspace comme une barre d'outils flottante ou ancrée. Votre administrateur doit activer cette fonction.
| + | The Workspace Main Window can be used as either a floating toolbar or a docked toolbar. Your administrator must enable this feature. |
| | | | |
| − | Vous pouvez ancrer la fenêtre principale de Workspace en haut de l'écran de trois manières différentes :
| + | There are three ways to dock the Workspace Main Window to the top of your display: |
| | | | |
| − | * Faites glisser la fenêtre principale de Workspace en haut de l'écran pour l'ancrer automatiquement en haut de la zone d'affichage de votre Bureau. Si vous souhaitez déplacer la fenêtre principale en haut de l'écran sans l'ancrer, maintenez la touche '''Ctrl''' enfoncée pendant que vous faites glisser la fenêtre. | + | * Drag the Workspace Main Window to the top of your display and it will automatically become docked to the top of your desktop display area. If you want to move the Main Window to the top of your display without docking, hold the '''Ctrl''' key while dragging the window. |
| − | * Double-cliquez sur la barre de titre. | + | * Double-click the title bar. |
| − | * Cliquez sur Agrandir. | + | * Click Maximize. |
| | | | |
| − | {{NoteFormat|Si vous n'avez pas accès à la fonction d'ancrage, double-cliquez sur la barre de titre ou cliquez sur '''Agrandir''' pour agrandir la fenêtre principale.|1}} | + | {{NoteFormat|If the docking feature has not been enabled for you, then double-clicking the title bar or clicking '''Maximize''' will cause the Main Window to be maximized.|1}} |
| | | | |
| − | Lorsque la fenêtre principale est ancrée, la zone effective de votre Bureau est réduite de la largeur de la fenêtre principale. Toutes les fenêtres ouvertes sur votre Bureau, y compris les fenêtres agrandies, sont déplacées vers le bas pour tenir compte de la fenêtre principale de Workspace. Les vues d'interaction épinglées ou flottantes n'affectent pas la taille de votre Bureau.
| + | When the Main Window is docked, your effective desktop area is reduced by the width of the Main Window. Any open windows, including maximized windows, on your desktop are moved down to accommodate the Workspace Main Window. Pinned or floating mode interaction views do not affect the size of your desktop area. |
| | | | |
| − | Lorsque la fenêtre principale est ancrée, les boutons Réduire et Agrandir sont désactivés.
| + | When the Main Window is docked, the Minimize and Maximize buttons are disabled. |
| | | | |
| − | Pour annuler l'ancrage de la fenêtre principale, cliquez sur la fenêtre et faites-la glisser à l'écart du haut de l'écran. Votre Bureau et la fenêtre principale de Workspace retrouvent la taille qu'ils avaient avant l'ancrage.
| + | To undock the Main Window, click and drag it away from the top of your display. Your desktop area returns to full size and the Workspace Main Window returns to the size it was before you docked it. |
| | | | |
| | <!-- Available styles: (default)-Important, 2-Tip, 3-Warning --> | | <!-- Available styles: (default)-Important, 2-Tip, 3-Warning --> |
| − | {{NoteFormat|Vous pouvez ancrer la fenêtre principale de Workspace même si d'autres barres d'outils sont déjà ancrées. La fenêtre principale de Workspace se place alors sous la dernière barre d'outils ancrée.|2}} | + | {{NoteFormat|The Workspace Main Window can be docked if other toolbars are already docked. The Workspace Main Window goes under the last docked toolbar.|2}} |
| | | | |
| − | {{#anc:Auto-hiding the Main Window}}
| + | ==Auto-hiding the Main Window== |
| − | ==Masquage automatique de la fenêtre principale==
| |
| | | | |
| − | Lorsque la fenêtre principale de Workspace est ancrée, vous pouvez choisir d'activer la fonction de masquage automatique. Sélectionnez '''Masquer automatiquement la fenêtre principale''' dans le '''menu principal''' ou dans le menu de Workspace dans la barre d'état système.
| + | When the Workspace Main Window is docked you can choose to enable the auto-hide feature. Select '''Auto-Hide the Main Window''' from the '''Main Menu''' or from the Workspace menu in the System Tray. |
| | | | |
| − | En mode masquage automatique, la fenêtre principale de Workspace est masquée en haut de l'écran et le Bureau retrouve sa taille maximale lorsque Workspace n'est plus l'application active.
| + | In Auto-Hide Mode, the Workspace Main Window is hidden at the top of the display and the desktop area returns to full size when Workspace is not the active application. |
| | | | |
| − | Pour afficher la fenêtre principale de Workspace lorsqu'elle est masquée, effectuez l'une des opérations suivantes :
| + | To display the Workspace Main Window when it is hidden, do one of the following actions: |
| | | | |
| − | * Cliquez sur le bouton de tâche Workspace dans la barre des tâches. | + | * Click the Workspace Task Button in the Task Bar. |
| − | * Déplacez le pointeur de la souris vers le haut du Bureau ; la fenêtre principale apparaît ; cliquez dessus pour qu'elle reste affichée. | + | * Move your mouse pointer to the top of your desktop display area; the Main Window is displayed; click it to keep it displayed. |
| | | | |
| − | Pour désactiver la fonction de masquage automatique, désélectionnez '''Masquer automatiquement la fenêtre principale''' dans le '''menu principal''' ou dans le menu de Workspace dans la barre d'état système.
| + | To disable the auto-hide feature, de-select '''Auto-Hide the Main Window''' from the '''Main Menu''' or from the Workspace menu in the System Tray. |
| | | | |
| | <!-- Available styles: (default)-Important, 2-Tip, 3-Warning --> | | <!-- Available styles: (default)-Important, 2-Tip, 3-Warning --> |
| − | {{NoteFormat|Si le mode de masquage automatique est déjà activé pour une autre barre d'outils ancrée en haut de l'écran, vous ne pouvez pas activer le mode de masquage automatique pour la fenêtre principale de Workspace. Si vous tentez d'activer le mode de masquage automatique, le message suivant apparaît : "Impossible de masquer automatiquement la fenêtre principale ici. Une autre fenêtre est déjà en mode masquer automatiquement sur ce bord de votre écran."|1}} | + | {{NoteFormat|If another toolbar that is docked at the top of the screen and is already in auto-hide mode, you cannot enable the Workspace Main Window auto-hide mode. If you try to enable the auto-hide mode, the following message is displayed: "You cannot auto-hide the Main Window here. Another window is already in auto-hide mode on this edge of your display."|1}} |
| | </toggledisplay><br> | | </toggledisplay><br> |
| | {{AnchorDiv|TeamCommunicator}} | | {{AnchorDiv|TeamCommunicator}} |
| − | <toggledisplay linkstyle font-size:larger showtext="[+] Lancement de nouvelles interactions à l’aide de Team Communicator" hidetext="[-] Lancement de nouvelles interactions à l’aide de Team Communicator"> | + | <toggledisplay linkstyle font-size:larger showtext="[+] Launch new interactions by using the Team Communicator" hidetext="[-] Launch new interactions by using the Team Communicator"> |
| − | {{#anc:Team Communicator}}
| |
| | ==Team Communicator== | | ==Team Communicator== |
| − | La fenêtre principale contient le champ [[Team_Communicator#Main_Window_Team_Communicator|Team Communicator - Recherche rapide]]. Le champ Recherche rapide est un outil de recherche universel. Il peut être configuré pour des recherches UCS (Universal Contact Server) et Team Communicator ou simplement une recherche Team Communicator. Team Communicator permet de lancer une nouvelle interaction.
| + | The Main Window contains the [[Team_Communicator#Main_Window_Team_Communicator|Team Communicator Quick Search]] field. The Quick Search field is a universal lookup tool. It might be configured to provide Universal Contact Server lookup and Team lookup, or simply Team lookup. Use the Team Communicator to launch a new interaction. |
| | | | |
| − | [[Image:IWContactManagementFull_850.png|thumb|center|Vue de gestion des contacts]] | + | [[Image:IWContactManagementFull_850.png|thumb|center|Contact Management view]] |
| | | | |
| − | Tapez un nom ou un numéro dans le champ pour commencer votre recherche. Lorsque vous cliquez dans le champ, la barre d'outils Team Communicator s'affiche. Vous pouvez alors effectuer des recherches dans tous les contacts, les contacts favoris, les contacts récents et les cibles internes ; vous pouvez configurer Workspace pour conserver ou afficher les appels récents, y compris les appels manqués. Par le biais de cette barre d'outils, il est également possible de filtrer par type de contact ou de cible interne, ainsi que de grouper ou de scinder les résultats de la recherche.
| + | Type a name or number in the field to begin your search. When you click in the field, the Team Communicator toolbar is displayed. The toolbar enables you to search All, Favorites, and Recent contacts and internal targets; Workspace might be configured to store and display recent calls, including missed calls. It also enables you to filter by contact or internal-target type and to group or ungroup your search results. |
| | | | |
| | <!-- Available styles: (default)-Important, 2-Tip, 3-Warning --> | | <!-- Available styles: (default)-Important, 2-Tip, 3-Warning --> |
| − | {{NoteFormat|Vous pouvez également utiliser l'[[Contact_Record|Annuaire des contacts]] et le menu '''Action''' situé en regard du nom d'un contact pour l'appeler ou lui envoyer un e-mail).|2}} | + | {{NoteFormat|You can also use the [[Contact_Record|Contact Directory]] and the '''Action''' menu that is next to the name of a contact to call or email a contact.)|2}} |
| | </toggledisplay><br> | | </toggledisplay><br> |
| | {{AnchorDiv|MyWorkspace}} | | {{AnchorDiv|MyWorkspace}} |
| − | <toggledisplay linkstyle font-size:larger showtext="[+] Affichage de vos canaux, historiques, statistiques (KPI) et statistiques du centre de contact dans Mon espace de travail" hidetext="[-] Affichage de vos canaux, historiques, statistiques (indicateurs de performance clés) et statistiques du centre de contact dans Mon espace de travail"> | + | <toggledisplay linkstyle font-size:larger showtext="[+] View your channels, history, statistics (KPIs) and contact-center statistics in My Workspace" hidetext="[-] View your channels, history, statistics (KPIs) and contact-center statistics in My Workspace"> |
| − | {{#anc:My Workspace}}
| + | ==My Workspace== |
| − | ==Mon espace de travail==
| |
| | | | |
| − | La vue Mon espace de travail est dotée d'onglets permettant d'afficher et de gérer les éléments suivants :
| + | My Workspace is a tabbed view that enables you to view and manage your: |
| | | | |
| − | * [[My_Status|Paramètres des canaux]] | + | * [[My_Status|Channel settings]] |
| − | * [[My_Campaigns|Campagnes]] | + | * [[My_Campaigns|Campaigns]] |
| − | * [[My_History|Historique]] | + | * [[My_History|History]] |
| − | * [[My_KPIs|Statistiques (KPI)]] | + | * [[My_KPIs|Statistics (KPIs)]] |
| − | * [[KPI_Summary|Statistiques du centre de contact]] | + | * [[KPI_Summary|Contact-center statistics]] |
| | | | |
| − | Cliquez sur le bouton '''Accéder aux vues d'appui de Workspace et les utiliser''' ([[File:IW_Supporting_Views_Button_850.png|link=]]) pour afficher le menu des '''vues d'appui''', puis choisissez l'une des options suivantes :
| + | Click the '''Access and use Workspace supporting views''' button ([[File:IW_Supporting_Views_Button_850.png|link=]]) to display the '''Supporting Views''' menu, then select one of the following options: |
| | | | |
| − | * Mes canaux | + | * My Channels |
| − | * Mes campagnes | + | * My Campaigns |
| − | * Mon historique | + | * My History |
| − | * Mes statistiques | + | * My Statistics |
| − | * Statistiques du centre de contact | + | * Contact Center Statistics |
| | | | |
| − | La vue Mon espace de travail s'affiche dans la barre Interaction. Cliquez sur les onglets pour afficher les différentes vues de Mon espace de travail.
| + | The My Workspace view is displayed below the Interaction Bar. Click the tabs to view the different My Workspace views. |
| | </toggledisplay><br> | | </toggledisplay><br> |
| | {{AnchorDiv|InteractionSearch}} | | {{AnchorDiv|InteractionSearch}} |
| − | <toggledisplay linkstyle font-size:larger showtext="[+] Recherche d’interactions" hidetext="[-] Recherche d’interactions"> | + | <toggledisplay linkstyle font-size:larger showtext="[+] Search for Interactions" hidetext="[-] Search for Interactions"> |
| − | {{#anc:Interaction Search}}
| + | ==Interaction Search== |
| − | ==Recherche d'interaction==
| + | ['''Added:''' 8.5.104.15] |
| − | ['''Ajouté :''' 8.5.104.15] | + | Workspace provides you with multiple ways to find interactions in your contact center interaction database. |
| − | Workspace offre de nombreuses méthodes de recherche des interactions au sein de la base de données d'interactions de votre centre de contacts. | |
| | | | |
| − | * Si vous connaissez le contact que vous recherchez, utilisez l'[[Contact_Record|Annuaire des contacts]] pour trouver les interactions échangées avec ce contact. | + | * If you know which contact you are searching for, use the [[Contact_Record|Contact Directory]] to find the interactions exchanged with that contact |
| − | * Si vous êtes l'agent qui a traité l'interaction, vous pouvez utiliser la vue [[My_History|Mon historique]] pour trouver les interactions que vous avez traitées. | + | * If you were the agent who handled the interaction you can use the [[My_History|My History]] view to find the interactions that you have handled |
| | | | |
| − | Il peut cependant arriver que vous deviez trouver une interaction sans vous souvenir du contact ou si l'interaction a été traitée par un autre agent ou par vous-même. Grâce à la fonction de recherche d'interactions globale de Workspace, vous pouvez ouvrir la vue '''[[Interaction_Search|Recherche d'interactions]]''' pour chercher des interactions selon un ou plusieurs critères de recherche, incluant des mots dans le corps ou la transcription de l'interaction.
| + | However, sometimes you must find an interaction, but you no longer remember who the contact was, or whether it was handled by yourself or another agent. The Workspace Global Interaction Search feature enables you to use the '''[[Interaction_Search|Interaction Search]]''' view to look for interactions based on one or more criteria, including words in the body or transcript of the interaction. |
| | | | |
| − | Pour afficher la vue Recherche d'interaction, cliquez sur le bouton '''Accéder aux vues d'appui de Workspace et les utiliser''' ([[File:IW_Supporting_Views_Button_850.png|link=]]) pour afficher le menu des '''Vues d'appui''', puis sélectionnez '''Recherche d’interaction'''. Cette fonction permet de rechercher des interactions. Consultez le [[Main_Window#Details_Panel|panneau de détails]] pour obtenir des détails sur les résultats de la recherche.
| + | To display the Interaction Search view, click the '''Access and use Workspace supporting views''' button ([[File:IW_Supporting_Views_Button_850.png|link=]]) to display the '''Supporting Views''' menu, then select '''Interaction Search'''. Use this feature to search for interactions. View details about the search results in the [[Main_Window#Details_Panel|Details Panel]]. |
| | | | |
| − | {{#anc:Quick Search}}
| + | ===Quick Search=== |
| − | ===Recherche rapide=== | |
| | | | |
| − | Pour faire des recherches dans la Base de données d'interactions, saisissez le texte à rechercher dans le champ [[Interaction_Search#Quick_Search|Recherche rapide]]. Cliquez sur la loupe pour effectuer une recherche sur la base des critères entrés.
| + | To search the Interaction Database, type your search text for in the [[Interaction_Search#Quick_Search|Quick Search]] field. Click the magnifying glass to search for the criteria that you have entered. |
| | | | |
| − | [[Image:IWContactQuickSearchButton_850.png|thumb|center|Bouton Recherche rapide]] | + | [[Image:IWContactQuickSearchButton_850.png|thumb|center|Quick Search button]] |
| | | | |
| − | Cliquez sur le '''X''' pour supprimer le contenu du champ Recherche rapide.
| + | Click the '''X''' to clear the Quick Search field. |
| | | | |
| − | La Recherche rapide combine un sous-ensemble de critères de recherche sélectionnés par votre administrateur. De manière typique, elle applique une recherche de type "commence par" pour chaque mot du critère dans chacun des attributs sélectionnés par votre administrateur.
| + | Quick Search combines a subset of search criteria selected by your administrator. It typically applies a "starts with" for each word of the criteria in any of the attributes selected by your administrator. |
| | | | |
| − | Les résultats de recherche sont affichés sous forme de grille. Cliquez sur une entrée de résultat pour afficher les [[Interaction_Search#Interaction_Details|détails de l'interaction]] dans l'onglet '''Détails'''. Vous pouvez également utiliser l'onglet '''Note''' pour visualiser les notes associées à l'interaction sélectionnée et l'onglet '''Données de contexte''' pour visualiser les informations de contexte de l'interaction.
| + | Search results are displayed in a grid. Click a result entry to display [[Interaction_Search#Interaction_Details|interaction details]] in the '''Details''' tab. You can also use the '''Note''' tab to view notes associated with the selected interaction and the '''Case Data''' tabs to view the interaction case information. |
| | | | |
| − | {{#anc:Advanced Search}}
| + | ===Advanced Search=== |
| − | ===Recherche avancée=== | |
| | | | |
| − | Cliquez sur le bouton à bascule '''Aff.'''/'''Masquer les options recherche avancée''' pour afficher ou masquer
| + | Click the '''Show'''/'''Hide Advanced Search''' toggle button to show or hide |
| − | ([[Image:IWShowHideAdvSrch_850.png|link=]]) la [[Interaction_Search#Advanced_Search|fonction de recherche avancée]]. | + | ([[Image:IWShowHideAdvSrch_850.png|link=]]) the [[Interaction_Search#Advanced_Search|advanced search feature]]. |
| | | | |
| − | La fonction Recherche avancée permet d'affiner votre recherche en entrant plusieurs critères. Le volet Recherche avancée contient des listes déroulantes de critères de recherche qui vous permettent de composer une recherche complexe basée sur des critères multiples tels que Etat, Objet, Agent de traitement, Date ou plage de date et Texte d'interaction.
| + | The Advanced Search feature enables you to enter multiple criteria to refine your search. The Advanced Search pane contains drop-down lists of search criteria that enable you to build a complex search based on multiple criteria such as Status, Subject, processing agent, date or date range, and interaction text. |
| | | | |
| − | Utilisez les options '''Réponse aux conditions''' pour spécifier si toutes ou l'une des conditions de recherche spécifiées sont appliquées. En fonction du critère sélectionné, il se peut que le modificateur appliqué affectant la recherche change (pour passer, par exemple, de "correspond" à "est égal à").
| + | Use the '''Match Conditions''' options to specify whether All or Any of the search conditions that you have specified are applied. Depending on the selected criteria the applied modifier affecting the search may change, for example, to "Matches" or "Equals". |
| | | | |
| − | Les résultats de recherche sont affichés sous forme de grille. Cliquez sur une entrée de résultat pour afficher les [[Interaction_Search#Interaction_Details|détails de l'interaction]] dans l'onglet '''Détails'''. Vous pouvez également utiliser l'onglet '''Note''' pour visualiser les notes associées à l'interaction sélectionnée et l'onglet '''Données de contexte''' pour visualiser les informations de contexte de l'interaction.
| + | Search results are displayed in a grid. Click a result entry to display [[Interaction_Search#Interaction_Details|interaction details]] in the '''Details''' tab. You can also use the '''Note''' tab to view notes associated with the selected interaction and the '''Case Data''' tabs to view the interaction case information. |
| | | | |
| − | {{#anc:Details Panel}}
| + | ===Details Panel=== |
| − | ===Panneau de détails=== | |
| | | | |
| − | Le Panneau de détails contient les onglets '''Détails''', '''Note''' et '''Données de contexte'''.
| + | The Details Panel includes the '''Details''', '''Note''', and '''Case Data''' tabs. |
| | | | |
| − | Vous pouvez afficher les [[Interaction_Search#Interaction_Details|détails de l'interaction]] de ''l'interaction actuellement sélectionnée'' dans le Panneau de détails, onglet '''Détails''', en cliquant sur le bouton à bascule '''Afficher le panneau de détails en bas'''/'''Masquer le Panneau de détails''' :
| + | You can view [[Interaction_Search#Interaction_Details|interaction details]] in the '''Details''' tab for the ''currently selected interaction'' in the Details Panel by clicking the '''Show Details Panel on Bottom'''/'''Hide Details Panel''' toggle button: |
| | | | |
| | [[Image:IW_ShowHideArrangeContactInfoHistoryButton_850.png|thumb|center]] | | [[Image:IW_ShowHideArrangeContactInfoHistoryButton_850.png|thumb|center]] |
| | | | |
| − | L'onglet Détails affiche les informations spécifiques à l'interaction. Par exemple, si vous avez sélectionné une interaction par e-mail, l'Objet, De, A, Etat et le corps des interactions par e-mail s'affichent.
| + | The Details tab displays interaction specific information. For example, if you have selected an email interaction, the Subject, From, To, State, and body of the email interactions are displayed. |
| | | | |
| − | L'onglet '''Note''' vous permet de visualiser les notes associées à l'interaction sélectionnée.
| + | The '''Note''' tab enables you to view notes that are associated with the selected interaction. |
| | | | |
| − | L'onglet '''Données de contexte''' vous permet de visualiser les informations de contexte de l'interaction sélectionnée.
| + | The '''Case Data''' tab enables you to view the case information for the selected interaction. |
| | </toggledisplay><br> | | </toggledisplay><br> |
| | {{AnchorDiv|ManageYourContacts}} | | {{AnchorDiv|ManageYourContacts}} |
| − | <toggledisplay linkstyle font-size:larger showtext="[+] Gestion des contacts" hidetext="[-] Gestion des contacts"> | + | <toggledisplay linkstyle font-size:larger showtext="[+] Manage contacts" hidetext="[-] Manage contacts"> |
| − | {{#anc:Manage Your Contacts}}
| + | ==Manage Your Contacts== |
| − | ==Gestion de vos contacts==
| |
| | | | |
| − | Cliquez sur le bouton '''Accéder aux vues d'appui de Workspace et les utiliser''' ([[File:IW_Supporting_Views_Button_850.png|link=]]) pour afficher le menu des '''vues d'appui''', puis choisissez '''Annuaire des contacts''' pour ouvrir l'[[Contact_Record|Annuaire des contacts]]. Cette fonction permet de rechercher des contacts. Consultez le [[Main_Window#Details_Panel|panneau de détails]] pour obtenir des détails sur les résultats de la recherche.
| + | Click the '''Access and use Workspace supporting views''' button ([[File:IW_Supporting_Views_Button_850.png|link=]]) to display the '''Supporting Views''' menu, then select '''Contact Directory''' to open the [[Contact_Record|Contact Directory]]. Use this feature to search for contacts. View details about the search results in the [[Main_Window#Details_Panel|Details Panel]]. |
| | | | |
| − | {{#anc:Quick Search}}
| + | ===Quick Search=== |
| − | ===Recherche rapide=== | |
| | | | |
| − | Pour effectuer une recherche dans l'Annuaire des contacts, tapez le nom, le numéro de téléphone ou l'adresse e-mail d'un contact dans le champ [[Contact_Record#Quick_Search|Recherche rapide]]. Cliquez sur la loupe pour effectuer une recherche sur la base des critères entrés.
| + | To search the Contact Directory, type the name, phone number, or email address of a contact in the [[Contact_Record#Quick_Search|Quick Search]] field. Click the magnifying glass to search for the criteria that you have entered. |
| | | | |
| − | [[Image:IWContactQuickSearchButton_850.png|thumb|center|Bouton Recherche rapide]] | + | [[Image:IWContactQuickSearchButton_850.png|thumb|center|Quick Search button]] |
| | | | |
| − | Cliquez sur le '''X''' pour supprimer le contenu du champ Recherche rapide.
| + | Click the '''X''' to clear the Quick Search field. |
| | | | |
| − | Une recherche rapide est de type ''Commence par''.
| + | Quick Search is a ''begins with'' search. |
| | | | |
| − | Les résultats de recherche sont affichés sous forme de liste ou de grille. Cliquez sur le bouton à bascule '''Afficher les contacts sous forme de grille'''/'''Afficher les contacts sous forme de liste''' pour passer d'une vue à l'autre de l'[[Contact_Record|Annuaire des contacts]].
| + | Search results are displayed in a grid or list. Click the '''Show Contacts in Grid View'''/'''Show Contacts in List View''' toggle button to toggle back and forth between the two views of the [[Contact_Record|Contact Directory]]. |
| | | | |
| | [[Image:IWGridListToggleButton_850.png|thumb|center]] | | [[Image:IWGridListToggleButton_850.png|thumb|center]] |
| | | | |
| − | {{#anc:Advanced Search}}
| + | ===Advanced Search=== |
| − | ===Recherche avancée=== | |
| | | | |
| − | Cliquez sur le bouton à bascule '''Aff.'''/'''Masquer les options recherche avancée''' pour afficher ou masquer
| + | Click the '''Show'''/'''Hide Advanced Search''' toggle button to show or hide |
| − | ([[Image:IWShowHideAdvSrch_850.png|link=]]) la [[Contact_Record#Advanced_Search|fonction de recherche avancée]]. | + | ([[Image:IWShowHideAdvSrch_850.png|link=]]) the [[Contact_Record#Advanced_Search|advanced search feature]]. |
| | | | |
| − | La fonction Recherche avancée permet d'affiner votre recherche en entrant plusieurs critères. Le volet Recherche avancée contient des listes déroulantes de critères de recherche, tels que des noms, des adresses e-mail et des numéros de téléphone. Il contient aussi des listes déroulantes dotées des modificateurs ci-après, qui déterminent l'impact des critères sur la recherche : '''Contient''', '''Commence par''' et '''Est'''. Utilisez les options '''Réponse aux conditions''' pour spécifier si toutes ou l'une des conditions de recherche spécifiées sont appliquées.
| + | The Advanced Search feature enables you to enter multiple criteria to refine your search. The Advanced Search pane contains drop-down lists of search criteria, such as names, email addresses, and phone numbers. It also contains drop-down lists with the following modifiers that determine how the criteria will affect the search: '''Contains''', '''Begins With''', and '''Is'''. Use the '''Match Conditions''' options to specify whether All or Any of the search conditions that you have specified are applied. |
| | | | |
| − | Les résultats de recherche sont affichés sous forme de liste ou de grille. Cliquez sur le bouton à bascule '''Afficher les contacts sous forme de grille'''/'''Afficher les contacts sous forme de liste''' pour passer d'une vue à l'autre de l'[[Contact_Record|Annuaire des contacts]].
| + | Search results are displayed in a grid or list. Click the '''Show Contacts in Grid View'''/'''Show Contacts in List View''' toggle button to toggle back and forth between the two views of the [[Contact_Record|Contact Directory]]. |
| | | | |
| | [[Image:IWGridListToggleButton_850.png|thumb|center]] | | [[Image:IWGridListToggleButton_850.png|thumb|center]] |
| | | | |
| − | {{#anc:Details Panel}}
| + | ====Details Panel==== |
| − | ====Panneau de détails==== | |
| | | | |
| − | Vous pouvez afficher les [[Contact_Record#Contact_Information_and_History|informations]] et l'[[History|historique du contact]] ''sélectionné'' dans le panneau de détails, en cliquant sur le bouton à bascule '''Afficher le panneau de détails en bas'''/'''Masquer le panneau de détails''' :
| + | You can view [[Contact_Record#Contact_Information_and_History|contact information]] and [[History|contact history]] for the ''currently selected contact'' in the Details Panel by clicking the '''Show Details Panel on Bottom'''/'''Hide Details Panel''' toggle button: |
| | | | |
| | [[Image:IW_ShowHideArrangeContactInfoHistoryButton_850.png|thumb|center]] | | [[Image:IW_ShowHideArrangeContactInfoHistoryButton_850.png|thumb|center]] |
| | | | |
| − | Cliquez sur la flèche vers le bas pour modifier la disposition du panneau de détails de sorte qu'il s'affiche en-dessous ou à droite de l'Annuaire des contacts :
| + | Click the down-arrow to change the Details Panel Layout to display either below or to the right of the Contact Directory: |
| | | | |
| − | [[Image:IW_Show_Details_Panel_Below_Right_850.png|thumb|center|Bouton Afficher le panneau de détails en bas]] | + | [[Image:IW_Show_Details_Panel_Below_Right_850.png|thumb|center|Show Details Below button]] |
| | | | |
| − | L'onglet Informations affiche des informations de base sur le contact sélectionné, parmi lesquelles :
| + | The Information tab displays basic information about the currently selected contact, including the following: |
| | | | |
| − | * Général (Titre, Prénom et Nom) | + | * General (Title, First Name, and Last Name) |
| − | * Numéro(s) de téléphone | + | * Phone Number(s) |
| − | * Adresse(s) e-mail | + | * E-Mail Address(es) |
| | | | |
| − | L'onglet '''Historique''' du contact permet d'afficher et, si la configuration vous le permet, de modifier les interactions en cours et archivées qui sont associées au contact sélectionné.
| + | The contact '''History''' tab enables you to view and, if you are configured to do so, edit current and archived interactions that are associated with the currently selected contact. |
| | | | |
| − | En fonction des autorisations qui vous sont accordées, vous pourrez éventuellement modifier un ou plusieurs champs de la vue '''Informations sur le contact'''.
| + | Depending on what permissions are granted to you by your administrator, you might be enabled to edit one or more fields of the '''Contact Information''' view. |
| | </toggledisplay><br> | | </toggledisplay><br> |
| | {{AnchorDiv|MyWorkbins}} | | {{AnchorDiv|MyWorkbins}} |
| − | <toggledisplay linkstyle font-size:larger showtext="[+] Accès à vos corbeilles" hidetext="[-] Accès à vos corbeilles"> | + | <toggledisplay linkstyle font-size:larger showtext="[+] Access your workbins" hidetext="[-] Access your workbins"> |
| − | {{#anc:My Workbins}}
| + | ==My Workbins== |
| − | ==Mes corbeilles==
| + | A [[Workbins|workbin]] is like a personal queue, in which you can store email and other interactions that are to be handled later. |
| − | Une [[Workbins|corbeille]] est semblable à une file d'attente personnelle. Vous pouvez y stocker des messages électroniques et d'autres interactions à traiter ultérieurement.
| |
| | | | |
| − | Cliquez sur le bouton '''Accéder aux vues d'appui de Workspace et les utiliser''' ([[File:IW_Supporting_Views_Button_850.png|link=]]) pour afficher le menu des '''vues d'appui''', puis choisissez l'une des vues Dossier suivantes :
| + | Click the '''Access and use Workspace supporting views''' button ([[File:IW_Supporting_Views_Button_850.png|link=]]) to display the '''Supporting Views''' menu, then select one of the following workbin views: |
| | | | |
| − | * '''Mes corbeilles''' : pour tous les agents, vue de vos corbeilles personnelles. | + | * '''My Workbins'''—For all agents, a view of your personal workbins. |
| − | * '''Les corbeilles de mon équipe''' : pour les chefs d'équipe (superviseurs), vue de toutes les corbeilles appartenant aux agents qu'ils supervisent. | + | * '''My Team Workbins'''—For Team Leads (supervisors), a view of all of the workbins that belong to agents that you supervise. |
| − | * '''Mes files d’attente interactions''' : pour les chefs d’équipe (superviseurs), vue filtrée de vos files d’attente système. | + | * '''My Interaction Queues'''—For Team Leads (supervisors), a filtered view of your system queues. |
| | | | |
| − | Pour afficher une autre corbeille, cliquez sur celle-ci dans l'Explorateur de corbeilles situé dans la partie gauche de la vue. Le nombre de messages électroniques non ouverts dans chaque corbeille est indiqué en regard du nom de la corbeille.
| + | To view another workbin, click it in the Workbin explorer on the left-hand side of the view. The number of unopened email messages in each workbin folder is indicated next to the name of the workbin folder. |
| | | | |
| − | La liste des corbeilles disponibles dépend de la configuration du système. La corbeille sélectionnée par défaut est la première de la liste qui est spécifiée par votre administrateur système. Voici un aperçu des corbeilles qui peuvent être configurées à votre intention :
| + | The list of available workbins depends on the configuration of your system. The default selected workbin is the first workbin in the list that is specified by your system administrator. Some of the workbins which might be configured for you include: |
| | | | |
| − | * '''En cours''' : contient des messages électroniques entrants et d'autres éléments de travail qui n'ont pas été traités. | + | * '''In-Progress'''—Contains inbound email messages or other workitems that have not been processed |
| − | * '''Brouillon''' : contient des messages électroniques sortants qui ont été enregistrés en tant que brouillons. | + | * '''Draft'''—Contains outbound email messages that have been saved as draft |
| | | | |
| − | Pour afficher les détails, remarques et données de contexte au sujet d'une interaction, sélectionnez-la. Les informations relatives à l'interaction sélectionnée sont affichées dans les onglets situés au bas de la vue Corbeilles. Pour afficher les onglets d'informations de l'interaction, cliquez sur le bouton '''Afficher/Masquer le panneau de détails.
| + | To view details, notes, and case date about an interaction, select it. Information about the selected interaction is displayed in the tabs at the bottom of the Workbins view. To display the interaction information tabs, click the '''Show/Hide Details Panel button. |
| | | | |
| | [[Image:IW_ShowHideArrangeWorkbinDetailsButton_850.png|thumb|center]] | | [[Image:IW_ShowHideArrangeWorkbinDetailsButton_850.png|thumb|center]] |
| | | | |
| − | Pour ouvrir une interaction, double-cliquez dessus.
| + | To open an interaction, double-click it. |
| | | | |
| − | Vous pouvez exécuter les fonctions suivantes sur les interactions sélectionnées dans des corbeilles en utilisant les '''boutons d'actions sur les corbeilles :
| + | You can perform the following functions on selected interactions in workbins by using the '''Workbin Actions buttons: |
| | | | |
| − | * '''Répondre''' ([[Image:IW_Workbin_Reply_Email_Button_850.png|link=]]) | + | * '''Reply''' ([[Image:IW_Workbin_Reply_Email_Button_850.png|link=]]) |
| − | * '''Répondre à tous''' ([[Image:IW_Workbin_ReplyAll_Email_Button_850.png|link=]]) | + | * '''Reply All''' ([[Image:IW_Workbin_ReplyAll_Email_Button_850.png|link=]]) |
| − | * '''Ouvrir''' ([[Image:IW_Workbin_Open_Button_850.png|link=]]) | + | * '''Open''' ([[Image:IW_Workbin_Open_Button_850.png|link=]]) |
| − | * '''Marquer comme terminé''' ([[Image:IW_Workbin_Mark_Done_Button_850.png|link=]]) | + | * '''Mark Done''' ([[Image:IW_Workbin_Mark_Done_Button_850.png|link=]]) |
| − | * '''Supprimer''' ([[Image:IW_Workbin_Email_Delete_Icon_850.png|link=]]) à condition de disposer des autorisations appropriées | + | * '''Delete''' ([[Image:IW_Workbin_Email_Delete_Icon_850.png|link=]])—if you have the correct permissions |
| − | * '''Déplacer dans la file d'attente''' ([[Image:IW_Workbin_Move_To_Queue_Button_850.png|link=]]) à condition de disposer des autorisations appropriées | + | * '''Move to Queue''' ([[Image:IW_Workbin_Move_To_Queue_Button_850.png|link=]])—if you have the correct permissions |
| − | * '''Déplacer dans le dossier''' ([[Image:IW_Workbin_Move_To_Workbin_Button_850.png|link=]]) à condition de disposer des autorisations appropriées | + | * '''Move to Workbin''' ([[Image:IW_Workbin_Move_To_Workbin_Button_850.png|link=]])—if you have the correct permissions |
| − | * '''Modifier les informations de contexte''' ([[Image:IW_Edit_Case_Data_Button_850.png|link=]]) : (si vous disposez des autorisations appropriées) ouvre la fenêtre Modifier les informations de contexte pour vous permettre de modifier le contenu de l'onglet [[Case_Data|Données de contexte]] des interactions sélectionnées. | + | * '''Edit Case Information''' ([[Image:IW_Edit_Case_Data_Button_850.png|link=]])—(if you have the correct permissions) Opens the Edit Case Information window to enable you to edit the content of the [[Case_Data|Case Data]] tab for the selected interaction(s). |
| | | | |
| − | Cliquez [[E-Mail_Interaction|ici]] pour obtenir des informations sur le traitement des interactions par e-mail.
| + | Click [[E-Mail_Interaction|here]] for information about handling email interactions. |
| | </toggledisplay><br> | | </toggledisplay><br> |
| | {{AnchorDiv|ManageYourInteractions}} | | {{AnchorDiv|ManageYourInteractions}} |
| − | <toggledisplay linkstyle font-size:larger showtext="[+] Gestion de vos fenêtres d’interactions actives avec la barre Interaction" hidetext="[-] Gestion de vos fenêtres d’interactions actives avec la barre Interaction"> | + | <toggledisplay linkstyle font-size:larger showtext="[+] Manage your active interaction windows by using the Interaction Bar" hidetext="[-] Manage your active interaction windows by using the Interaction Bar"> |
| − | {{#anc:Manage Your Interactions}}
| + | ==Manage Your Interactions== |
| − | ==Gestion des interactions==
| |
| | | | |
| − | {{#anc:Interaction Bar}}
| + | ===Interaction Bar=== |
| − | ===Barre Interaction=== | + | The Interaction Bar is displayed at the bottom of the Main Window whenever you have one or more active interactions. Each interaction is represented by a control bar and an Interaction Window. You can use the control bar to perform basic actions that are specific to the interaction type, such as ending a call. |
| − | La barre Interaction s'affiche au bas de la fenêtre principale lorsqu'une ou plusieurs interactions sont actives. Chaque interaction est représentée par une barre de contrôle et une fenêtre d’interaction. Vous pouvez utiliser la barre de contrôle pour effectuer des actions de base spécifiques du type d’interaction, par exemple mettre fin à un appel.
| |
| | | | |
| − | [[file:IW_Main_Window_Interaction_Bar_850.png|500px|thumb|center|Barre Interaction de la fenêtre principale]] | + | [[file:IW_Main_Window_Interaction_Bar_850.png|500px|thumb|center|Main Window Interaction Bar]] |
| | | | |
| − | Cliquez sur la barre de contrôle d'une interaction pour la sélectionner. Toutes les autres interactions ouvertes sont réduites au niveau de la barre Interaction.
| + | Click the control bar for an interaction to give it the focus. All other open interactions are collapsed to the Interaction Bar. |
| | | | |
| − | Cliquez sur la petite barre de couleur à gauche de la commande d'interaction pour passer du mode épinglé au mode flottant et inversement. Vous pouvez configurer le mode épinglé ou flottant de chaque interaction indépendamment des autres.
| + | Click the small colored bar on the left of the interaction control, to toggle between pinned mode and floating mode. Each interaction can be set to pinned or floating mode independently. |
| | | | |
| − | En mode épinglé, la vue Interaction apparaît dans la fenêtre principale sous la barre Interaction et toutes les autres vues, comme Mes canaux, sont masquées. Les vues Contact et Réponse sont accessibles.
| + | In pinned mode, the interaction view is displayed in the Main Window below the Interaction Bar, and all other views, such as My Channels, are hidden. Contact view and Response view are accessible. |
| | | | |
| − | [[file:IW_Main_Window_Pinned_Interaction_850.png|500px|thumb|center|Barre Interaction de la fenêtre principale en mode épinglé]] | + | [[file:IW_Main_Window_Pinned_Interaction_850.png|500px|thumb|center|Main Window Interaction Bar with a pinned interaction]] |
| | | | |
| − | En mode flottant, la vue Interaction apparaît sous la forme d'une vue miniature en bas de la barre Interaction. Si d'autres interactions sont actuellement ouvertes en mode épinglé ou si une ou plusieurs vues de Workspace, comme Mes canaux, sont actuellement affichées, elles apparaissent grisées derrière la vue Interaction flottante.
| + | In floating mode, the interaction view is displayed as a small view that is attached to the bottom of the Interaction Bar. If other interactions are currently open in pinned mode or if one the Workspace views, such as My Channels is currently displayed, they will appear dimmed behind the floating interaction view. |
| | | | |
| − | [[file:IW_Main_Window_Floating_Interaction_850.png|500px|thumb|center|Barre Interaction de la fenêtre principale en mode flottant]] | + | [[file:IW_Main_Window_Floating_Interaction_850.png|500px|thumb|center|Main Window Interaction Bar with a floating interaction]] |
| | | | |
| − | Lorsque plusieurs interactions sont actives, cliquez sur l'interaction pour l'afficher.
| + | When you have more than one active interaction, click the interaction to display it. |
| | | | |
| − | Deux évènements se produisent si vous placez le pointeur de votre souris sur une interaction dans la Barre d'interaction :
| + | If you place your mouse pointer over an interaction in the Interaction Bar, two things occur: |
| | <ul> | | <ul> |
| − | <li>Une infobulle s'affiche et résume le contenu de l'interaction. Elle contient un résumé de toutes les interactions comprises dans ce fil, ainsi que toute interaction de consultation liée.</li> | + | <li>A Tooltip is displayed that summarizes the content of the interaction. It includes a summary of all the interactions that are involved in this thread, as well as any consultation interactions that are related to the interaction.</li> |
| − | <li>L'icône média de l'interaction est un bouton qui s'active lorsque vous approchez votre souris. Si vous cliquez sur l'icône média, Workspace passe à cette interaction sans ouvrir la vue Interaction.</li> | + | <li>The media icon in the interaction is a button that activates when you place your mouse pointer near it. If you click the media icon, Workspace switches to that interaction without opening the interaction view.</li> |
| | </ul> | | </ul> |
| − | [[File:IW_851_Switch_Inx_Media_Icon_Button.png|500px|thumb|center|Utilisez le bouton Changer de média pour basculer vers le média sans ouvrir la vue Interaction.]] | + | [[File:IW_851_Switch_Inx_Media_Icon_Button.png|500px|thumb|center|Use the switch media button to switch media without opening the interaction view.]] |
| | | | |
| − | Les entrées de la barre Interaction clignotent lorsque des événements spécifiques nécessitent une intervention immédiate. Chat, Session SMS et Interactions MI clignotent lors de la réception d'un nouveau message.
| + | Entries in the Interaction Bar flash (or blink) when specific events occur that might require your immediate attention. Chat, SMS Session, and IM Interactions flash when a new message is received. |
| | | | |
| − | Pour disposer d'un espace maximal dans la barre Interaction lorsque vous traitez une interaction, la vue Team Communicator est réduite sous la forme d'un bouton : [[Image:IW_Main_Window_TeamComm_Button_850.png|link=]]
| + | To allow for the maximum space in the Interaction Bar, when you are handling an interaction, the Team Communicator view is reduced to a button: [[Image:IW_Main_Window_TeamComm_Button_850.png|link=]] |
| | | | |
| | {{NoteFormat| | | {{NoteFormat| |
| − | Il se peut que votre système soit configuré pour réduire automatiquement toutes les barres de commande d'interaction dans la Barre d'interaction. Cette configuration permet de voir une application tierce ou un autre contenu dans la fenêtre principale avant ou pendant le traitement d'une interaction. Pour afficher la vue d'interaction d'une interaction réduite, cliquez sur la barre de commande. '''Ajouté :''' 8.5.106.19
| + | Your system might be configured so that all interaction control bars are automatically collapsed in the Interaction Bar. This might be done to enable you to see a third party application or other content in the Main Window before or during the handling of an interaction. To display an interaction view for a collapsed interaction, click the control bar. '''Added:''' 8.5.106.19 |
| | |2}} | | |2}} |
| | | | |
| − | {{#anc:Interaction Window}}
| + | ===Interaction Window=== |
| − | ===Fenêtre d'interaction=== | |
| | | | |
| − | Vous pouvez utiliser la fenêtre d’interaction pour traiter les interactions, comme un appel vocal ou un Chat. Chaque type d’interaction est associé à sa propre fenêtre d’interaction.
| + | You can use the Interaction Window to handle interactions, such as a voice call or a chat. Each interaction type has its own interaction window. |
| | | | |
| − | * [[Voice_Interaction|Interaction vocale]] : permet de visualiser toutes les informations nécessaires pour traiter une interaction vocale avec un contact ou un agent interne. | + | * [[Voice_Interaction|Voice Interaction]]—Enables you to view all of the information that is necessary to handle a voice interaction with a contact or an internal agent. |
| − | * [[Web_Callback_Interaction|Interaction de rappel Web]] : permet de visualiser toutes les informations nécessaires pour traiter une interaction de rappel Web vocale avec un contact. | + | * [[Web_Callback_Interaction|Web Callback Interaction]]—Enables you to view the information that is necessary to handle a web callback voice interaction with a contact. |
| − | * [[Chat_Interaction|Interaction par Chat]] : permet de visualiser toutes les informations nécessaires pour traiter une interaction par Chat avec un contact ou un agent interne. | + | * [[Chat_Interaction|Chat Interaction]]—Enables you to view all of the information that is necessary to handle a chat interaction with a contact or an internal agent. |
| − | * [[E-Mail_Interaction|Interaction par e-mail]] : permet de visualiser toutes les informations nécessaires pour traiter les interactions par e-mail entrant et sortant avec un contact ou un agent interne, mais aussi le contrôle AQ des interactions par e-mail sortant. | + | * [[E-Mail_Interaction|E-Mail Interaction]]—Enables you to view all of the information that is necessary to handle inbound and outbound email interactions with a contact or internal agent, and how to handle QA review of outbound email interactions. |
| − | * [[SMS_Interaction|Interaction SMS]] : permet de visualiser toutes les informations nécessaires pour traiter une interaction SMS avec un contact. | + | * [[SMS_Interaction|SMS Interaction]]—Enables you to view all of the information that is necessary to handle an SMS interaction with a contact. |
| − | * [[Workitems|Éléments de travail]] : permet de visualiser les types de médias non interactifs, tels que les fax. | + | * [[Workitems|Workitems]]—Enables you to view non-interactive media types, such as faxes. |
| | | | |
| − | Cette vidéo illustre comment gérer l’affichage de l’interaction, les informations de contact et l’historique, ainsi que les réponses standards dans la fenêtre d’interaction.
| + | This video shows you how to manage the display of the interaction, the contact information and history, and the standard responses in the Interaction Window. |
| | | | |
| | {{#widget:Vimeo|id=195539408|width=572|height=392}} | | {{#widget:Vimeo|id=195539408|width=572|height=392}} |
| Ligne 373 : |
Ligne 350 : |
| | </toggledisplay><br> | | </toggledisplay><br> |
| | {{AnchorDiv|ViewYourMessages}} | | {{AnchorDiv|ViewYourMessages}} |
| − | <toggledisplay linkstyle font-size:larger showtext="[+]Consultation de vos messages" hidetext="[-]Consultation de vos messages"> | + | <toggledisplay linkstyle font-size:larger showtext="[+] View your messages" hidetext="[-] View your messages"> |
| − | {{#anc:View Your Messages}}
| + | ==View Your Messages== |
| − | ==Affichage de vos messages==
| |
| | | | |
| − | ['''Modifié :''' 8.5.100.05] | + | ['''Modified:''' 8.5.100.05] |
| | | | |
| − | L'affichage des [[My_Messages|messages]] est une liste déroulante répertoriant les modifications de l'état des divers composants du réseau, tels que Contact Server, Statistics Server, Interaction Server (pour le Chat, la messagerie électronique et les éléments de travail) et votre commutateur vocal. Vous pouvez également afficher les messages qui vous sont envoyés.
| + | The [[My_Messages|message]] display is a scrollable list of changes to the status of various network components, such as Contact Server, Statistics Server, Interaction Server (for chat, email, and workitems), and your Voice switch. You can also view messages that are broadcast to you. |
| | | | |
| − | Cliquez sur le bouton '''Accéder aux vues d'appui de Workspace et les utiliser''' ([[File:IW_Supporting_Views_Button_850.png|link=]]) pour afficher le menu des '''vues d'appui''', puis choisissez '''Mes messages''' pour ouvrir la vue Mes messages qui présente une liste des messages de votre administrateur système ou superviseur.
| + | Click the '''Access and use Workspace supporting views''' button ([[File:IW_Supporting_Views_Button_850.png|link=]]) to display the '''Supporting Views''' menu, then select '''My Messages''' to open the My Messages view which displays a list of messages from your system administrator or supervisor. |
| | | | |
| − | Votre administrateur peut configurer Workspace pour afficher le nombre de messages diffusés non lus à l'aide d'un "indicateur de messages en attente" ([[File:IW_Voicemail_MWI_851.png|link=]]) tant dans le bouton '''Accéder aux vues d'appui de Workspace et les utiliser''' ([[File:IW_Supporting_Views_Button_850.png|link=]]) que dans le menu des '''vues d'appui''' (pour plus d'informations, reportez-vous à la rubrique [[Main_Window#View_and_Connect_to_Your_Voicemail_Messages|Affichage et connexion à vos messages vocaux]]).
| + | Workspace might be configured by your administrator to display the number of unread broadcast messages by using a "message waiting indicator" ([[File:IW_Voicemail_MWI_851.png|link=]]) both on the '''Access and use Workspace supporting views''' button ([[File:IW_Supporting_Views_Button_850.png|link=]]) and in the '''Supporting Views''' menu (see [[Main_Window#View_and_Connect_to_Your_Voicemail_Messages|View and Connect to Your Voicemail Messages]] for more information. |
| | </toggledisplay><br> | | </toggledisplay><br> |
| | {{AnchorDiv|ViewAndConnectToYourVoicemailMessages}} | | {{AnchorDiv|ViewAndConnectToYourVoicemailMessages}} |
| − | <toggledisplay linkstyle font-size:larger showtext="[+]Affichage et connexion aux messages vocaux" hidetext="[-]Affichage et connexion aux messages vocaux"> | + | <toggledisplay linkstyle font-size:larger showtext="[+] View and connect to your voicemail messages" hidetext="[-] View and connect to your voicemail messages"> |
| − | {{#anc:View and Connect to Your Voicemail Messages}}
| + | ==View and Connect to Your Voicemail Messages== |
| − | ==Affichage et connexion à vos messages vocaux==
| |
| | | | |
| − | ['''Ajouté :''' 8.5.100.05] | + | ['''Added:''' 8.5.100.05] |
| | | | |
| − | Si votre système est configuré pour vous permettre de récupérer vos messages vocaux dans Workspace, un "indicateur de messages en attente" ([[File:IW_Voicemail_MWI_851.png|link=]]) s'affiche dans le bouton '''Accéder aux vues d'appui de Workspace et les utiliser''' ([[File:IW_Supporting_Views_Button_850.png|link=]]).
| + | If your system is configured to enable you to use Workspace to retrieve your voicemail messages, a "messages waiting indicator" ([[File:IW_Voicemail_MWI_851.png|link=]]) is displayed on the '''Access and use Workspace supporting views''' button ([[File:IW_Supporting_Views_Button_850.png|link=]]). |
| | | | |
| − | Cliquez sur [[File:IW_Supporting_Views_Button_850.png|link=]] pour afficher le menu des '''vues d'appui'''. Vos boîtes vocales apparaissent dans le menu. Si vous avez des messages vocaux non écoutés, un "indicateur de messages en attente" ([[File:IW_Voicemail_MWI_851.png|link=]]) s'affiche en regard du nom de la boîte vocale.
| + | Click [[File:IW_Supporting_Views_Button_850.png|link=]] to display the '''Supporting Views''' menu. Your voicemail boxes are displayed in the menu. If you have voicemail messages that you have not played, a "messages waiting indicator" ([[File:IW_Voicemail_MWI_851.png|link=]]) is displayed beside the name of the voicemail box. |
| | | | |
| − | Pour accéder à votre boîte vocale, sélectionnez-la dans le menu des '''vues d'appui'''. Une nouvelle interaction interne est lancée. Utilisez le clavier pour taper vos données d’authentification.
| + | To call your voicemail box select it from the '''Supporting Views''' menu. A new internal interaction is launched. Use the keypad to enter your authentication information. |
| | | | |
| − | L'indicateur de messages en attente affiche le total des messages non écoutés et non lus dans vos boîtes vocales et dans la vue '''[[My_Messages|Mes messages]]'''.
| + | The message waiting indicator displays the total of all unplayed and unread messages in your voicemail boxes and the '''[[My_Messages|My Messages]]''' view. |
| | | | |
| − | {{NoteFormat|Si vous passez le pointeur de la souris sur l’indicateur de messages en attente, une info‑bulle apparaît, indiquant le nombre de messages dans chacune de vos boîtes vocales et dans la vue '''Mes messages'''.|2}} | + | {{NoteFormat|If you hover your mouse pointer over the message waiting indicator, a tooltip is displayed that lists the number of messages in each of your voicemail boxes and the '''My Messages''' view.|2}} |
| | | | |
| − | Pour plus d'informations sur l'utilisation des boîtes vocales, reportez-vous à la rubrique [[Documentation:IW:User:VoicemailMessage:8.5.1|Connexion à vos messages vocaux]] dans le ''guide de l'utilisateur de Workspace 8.5.1''.
| + | For information about using your voicemail boxes, refer to [[Documentation:IW:User:VoicemailMessage:8.5.1|Connecting to your Voicemail Messages]] in the ''Workspace 8.5.1 User's Guide''. |
| | </toggledisplay><br> | | </toggledisplay><br> |
| | {{AnchorDiv|InteractionPreview}} | | {{AnchorDiv|InteractionPreview}} |
| − | <toggledisplay linkstyle font-size:larger showtext="[+]Acceptation ou refus d’interactions entrantes à l’aide de l’Aperçu de l’interaction" hidetext="[-]Acceptation ou refus d’interactions entrantes à l’aide de l’Aperçu de l’interaction"> | + | <toggledisplay linkstyle font-size:larger showtext="[+] Accept or reject inbound interactions by using the Interaction Preview" hidetext="[-] Accept or reject inbound interactions by using the Interaction Preview"> |
| − | {{#anc:Interaction Preview}}
| + | ==Interaction Preview== |
| − | ==Aperçu de l’interaction==
| |
| | | | |
| − | Si une nouvelle interaction arrive sur votre poste de travail, vous en êtes informé par la notification interactive [[Interaction_Preview|Aperçu de l'interaction]], sauf si le répondeur automatique est enclenché. L'aperçu inclut des données jointes grâce auxquelles vous pouvez décider d'accepter ou de refuser l'interaction.
| + | If a new interaction arrives at your workstation, you are notified by the [[Interaction_Preview|Interaction Preview]] interactive notification, unless you are configured for auto-answer. The preview includes attached data that enables you to decide whether to accept or reject the interaction. |
| | </toggledisplay><br> | | </toggledisplay><br> |
| | {{AnchorDiv|InstantMessage}} | | {{AnchorDiv|InstantMessage}} |
| − | <toggledisplay linkstyle font-size:larger showtext="[+]Démarrage d’une session de messagerie instantanée" hidetext="[-]Démarrage d’une session de messagerie instantanée"> | + | <toggledisplay linkstyle font-size:larger showtext="[+] Start an Instant Message session" hidetext="[-] Start an Instant Message session"> |
| − | {{#anc:Instant Message}}
| + | ==Instant Message== |
| − | ==Message instantané== | |
| | | | |
| − | Démarrage d'une [[Internal_IM|session de messagerie instantanée]] avec une cible interne
| + | Start an [[Internal_IM|Instant Message session]] with an internal target |
| | </toggledisplay><br> | | </toggledisplay><br> |
| | {{AnchorDiv|OutboundCampaign}} | | {{AnchorDiv|OutboundCampaign}} |
| − | <toggledisplay linkstyle font-size:larger showtext="[+]Participation à une campagne d’appels sortants" hidetext="[-]Participation à une campagne d’appels sortants"> | + | <toggledisplay linkstyle font-size:larger showtext="[+] Participate in an Outbound campaign" hidetext="[-] Participate in an Outbound campaign"> |
| − | {{#anc:Outbound Campaign}}
| + | ==Outbound Campaign== |
| − | ==Campagne d'appels sortants==
| |
| | | | |
| − | Participation à une [[Outbound_Campaigns_Overview|campagne d'appels sortants]]
| + | Participate in an [[Outbound_Campaigns_Overview|Outbound campaign]] |
| | </toggledisplay> | | </toggledisplay> |
| | | | |
Main Window
[Modified: 8.5.109.16]
[Modified: 8.5.108.11]
[Modified: 8.5.104.15]
The Main Window enables you to:
[+] Manage your status
Manage Your Status
[Modified: 8.5.108.11]
You can manage your status from two places in the Main Window:
The title bar of the Main Window displays your global status icon and your logged in status. You can use the Global Status menu to log on and off of your channels.
Click the Global Status icon (see figure) on the Main Window title bar to open your Global Status menu.
thumb|center|Global Status Menu
Place the mouse pointer over the Global Status icon to view your status summary.
thumb|center|Hovering pointer over the Status Icon
The status summary includes your login name, place, channels, and channel status.
If you are logged in to more than one channel, detailed status for each channel is displayed; otherwise, only your Ready state is displayed.
Your Ready status is also displayed in the My Channels tab of the Main Window. You can manage your status and forward interactions from the My Channels tab.
Not Ready Status
When you are handling an interaction, the system interrupts the display of the amount of time that you are in the current state.
If, while you are handling an interaction for a given channel, you set your status to either Not Ready, Not Ready - <reason>, or After Call Work (ACW) the system does not display the amount of time that you are in that state until the interaction is complete. This feature enables your break or ACW time to be displayed according to recorded statistics.
Logoff/Logon Channels
[Modified: 8.5.108.11]
You can use the Global Status menu to log on to all channels that are logged off, or to log off from all channels without logging out. You can use the My Channels tab to log on and log off individual channels.

Click the Global Status menu and select Log On to log on to all logged off channels
To see what channels are logged on or off, either open the My Channels tab or hover your mouse pointer over the Global Status icon.

You can use the My Channels tab or the Global Status icon to determine which channels are logged on or off
Inactivity Timeout
Inactivity Timeout is a security feature that locks the Workspace windows on your workstation if you do not use your mouse or keyboard for a period of time that is defined by your administrator. You must authenticate to reactivate Workspace.
[+] Manage your settings and preferences
Manage Your Settings and Preferences
Click the Agent icon (link=) to open the Main Menu. You control your settings and set your preferences from the Main Menu.
The Main Menu contains some or all of the following functions, depending on how your account is configured by your system administrator:
- Show Statistics Gadget—Displays the Statistics Gadget view
- Main Window Always on Top—Keeps the Main Window on top of any other window that opens on your desktop
- Auto-Hide the Main Window—Hides the Main Window at the top of the display only when the Workspace Main Window is docked.
- Refine Place / Channel information—Displays the Advanced Login Parameters view to change your logged-in channel parameters
- Change Theme—Selects a different predefined appearance from the Theme menu
- Zoom—Enables you to specify the zoom level of text fields and transcripts.
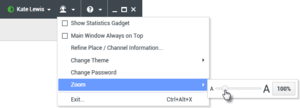
Zoom slider control in the Main Menu
- IM (text entry, transcript, and interaction data tooltip)
- Chat (text entry, transcript, and interaction data tooltip)
- Email (text entry and inbound email view)
- SMS (text entry, transcript, and interaction data tooltip)
- Interaction history (IM, Chat, Email, and SMS)
- Standard responses
- Social media (text entry only)
- Check and Update—Checks for updates to Workspace, and updates your software if an update is available
- Change Password—Displays the Change Password dialog box.
- Exit—Logs off all channels and closes the application
Important
For visually impaired agents, your administrator can configure the system to make the Workspace High Contrast theme available to you in the
Change Theme menu. This theme is designed to meet the requirements of the Web Content Accessibility Guidelines (WCAG) 2.0 requirements, with some limitations. This theme might already be available to you.
Click the Help icon (link=) to launch this help document or click the Help drop-down menu to launch this help document or get information about Workspace.
Docking the Main Window
The Workspace Main Window can be used as either a floating toolbar or a docked toolbar. Your administrator must enable this feature.
There are three ways to dock the Workspace Main Window to the top of your display:
- Drag the Workspace Main Window to the top of your display and it will automatically become docked to the top of your desktop display area. If you want to move the Main Window to the top of your display without docking, hold the Ctrl key while dragging the window.
- Double-click the title bar.
- Click Maximize.
Important
If the docking feature has not been enabled for you, then double-clicking the title bar or clicking
Maximize will cause the Main Window to be maximized.
When the Main Window is docked, your effective desktop area is reduced by the width of the Main Window. Any open windows, including maximized windows, on your desktop are moved down to accommodate the Workspace Main Window. Pinned or floating mode interaction views do not affect the size of your desktop area.
When the Main Window is docked, the Minimize and Maximize buttons are disabled.
To undock the Main Window, click and drag it away from the top of your display. Your desktop area returns to full size and the Workspace Main Window returns to the size it was before you docked it.
Conseil
The Workspace Main Window can be docked if other toolbars are already docked. The Workspace Main Window goes under the last docked toolbar.
Auto-hiding the Main Window
When the Workspace Main Window is docked you can choose to enable the auto-hide feature. Select Auto-Hide the Main Window from the Main Menu or from the Workspace menu in the System Tray.
In Auto-Hide Mode, the Workspace Main Window is hidden at the top of the display and the desktop area returns to full size when Workspace is not the active application.
To display the Workspace Main Window when it is hidden, do one of the following actions:
- Click the Workspace Task Button in the Task Bar.
- Move your mouse pointer to the top of your desktop display area; the Main Window is displayed; click it to keep it displayed.
To disable the auto-hide feature, de-select Auto-Hide the Main Window from the Main Menu or from the Workspace menu in the System Tray.
Important
If another toolbar that is docked at the top of the screen and is already in auto-hide mode, you cannot enable the Workspace Main Window auto-hide mode. If you try to enable the auto-hide mode, the following message is displayed: "You cannot auto-hide the Main Window here. Another window is already in auto-hide mode on this edge of your display."
[+] Launch new interactions by using the Team Communicator
Team Communicator
The Main Window contains the Team Communicator Quick Search field. The Quick Search field is a universal lookup tool. It might be configured to provide Universal Contact Server lookup and Team lookup, or simply Team lookup. Use the Team Communicator to launch a new interaction.
thumb|center|Contact Management view
Type a name or number in the field to begin your search. When you click in the field, the Team Communicator toolbar is displayed. The toolbar enables you to search All, Favorites, and Recent contacts and internal targets; Workspace might be configured to store and display recent calls, including missed calls. It also enables you to filter by contact or internal-target type and to group or ungroup your search results.
Conseil
You can also use the
Contact Directory and the
Action menu that is next to the name of a contact to call or email a contact.)
[+] View your channels, history, statistics (KPIs) and contact-center statistics in My Workspace
My Workspace
My Workspace is a tabbed view that enables you to view and manage your:
Click the Access and use Workspace supporting views button ( ) to display the Supporting Views menu, then select one of the following options:
- My Channels
- My Campaigns
- My History
- My Statistics
- Contact Center Statistics
The My Workspace view is displayed below the Interaction Bar. Click the tabs to view the different My Workspace views.
[+] Search for Interactions
Interaction Search
[Added: 8.5.104.15]
Workspace provides you with multiple ways to find interactions in your contact center interaction database.
- If you know which contact you are searching for, use the Contact Directory to find the interactions exchanged with that contact
- If you were the agent who handled the interaction you can use the My History view to find the interactions that you have handled
However, sometimes you must find an interaction, but you no longer remember who the contact was, or whether it was handled by yourself or another agent. The Workspace Global Interaction Search feature enables you to use the Interaction Search view to look for interactions based on one or more criteria, including words in the body or transcript of the interaction.
To display the Interaction Search view, click the Access and use Workspace supporting views button () to display the Supporting Views menu, then select Interaction Search. Use this feature to search for interactions. View details about the search results in the Details Panel.
Quick Search
To search the Interaction Database, type your search text for in the Quick Search field. Click the magnifying glass to search for the criteria that you have entered.
thumb|center|Quick Search button
Click the X to clear the Quick Search field.
Quick Search combines a subset of search criteria selected by your administrator. It typically applies a "starts with" for each word of the criteria in any of the attributes selected by your administrator.
Search results are displayed in a grid. Click a result entry to display interaction details in the Details tab. You can also use the Note tab to view notes associated with the selected interaction and the Case Data tabs to view the interaction case information.
Advanced Search
Click the Show/Hide Advanced Search toggle button to show or hide
(link=) the advanced search feature.
The Advanced Search feature enables you to enter multiple criteria to refine your search. The Advanced Search pane contains drop-down lists of search criteria that enable you to build a complex search based on multiple criteria such as Status, Subject, processing agent, date or date range, and interaction text.
Use the Match Conditions options to specify whether All or Any of the search conditions that you have specified are applied. Depending on the selected criteria the applied modifier affecting the search may change, for example, to "Matches" or "Equals".
Search results are displayed in a grid. Click a result entry to display interaction details in the Details tab. You can also use the Note tab to view notes associated with the selected interaction and the Case Data tabs to view the interaction case information.
Details Panel
The Details Panel includes the Details, Note, and Case Data tabs.
You can view interaction details in the Details tab for the currently selected interaction in the Details Panel by clicking the Show Details Panel on Bottom/Hide Details Panel toggle button:
thumb|center
The Details tab displays interaction specific information. For example, if you have selected an email interaction, the Subject, From, To, State, and body of the email interactions are displayed.
The Note tab enables you to view notes that are associated with the selected interaction.
The Case Data tab enables you to view the case information for the selected interaction.
[+] Manage contacts
Manage Your Contacts
Click the Access and use Workspace supporting views button () to display the Supporting Views menu, then select Contact Directory to open the Contact Directory. Use this feature to search for contacts. View details about the search results in the Details Panel.
Quick Search
To search the Contact Directory, type the name, phone number, or email address of a contact in the Quick Search field. Click the magnifying glass to search for the criteria that you have entered.
thumb|center|Quick Search button
Click the X to clear the Quick Search field.
Quick Search is a begins with search.
Search results are displayed in a grid or list. Click the Show Contacts in Grid View/Show Contacts in List View toggle button to toggle back and forth between the two views of the Contact Directory.
thumb|center
Advanced Search
Click the Show/Hide Advanced Search toggle button to show or hide
(link=) the advanced search feature.
The Advanced Search feature enables you to enter multiple criteria to refine your search. The Advanced Search pane contains drop-down lists of search criteria, such as names, email addresses, and phone numbers. It also contains drop-down lists with the following modifiers that determine how the criteria will affect the search: Contains, Begins With, and Is. Use the Match Conditions options to specify whether All or Any of the search conditions that you have specified are applied.
Search results are displayed in a grid or list. Click the Show Contacts in Grid View/Show Contacts in List View toggle button to toggle back and forth between the two views of the Contact Directory.
thumb|center
Details Panel
You can view contact information and contact history for the currently selected contact in the Details Panel by clicking the Show Details Panel on Bottom/Hide Details Panel toggle button:
thumb|center
Click the down-arrow to change the Details Panel Layout to display either below or to the right of the Contact Directory:
thumb|center|Show Details Below button
The Information tab displays basic information about the currently selected contact, including the following:
- General (Title, First Name, and Last Name)
- Phone Number(s)
- E-Mail Address(es)
The contact History tab enables you to view and, if you are configured to do so, edit current and archived interactions that are associated with the currently selected contact.
Depending on what permissions are granted to you by your administrator, you might be enabled to edit one or more fields of the Contact Information view.
[+] Access your workbins
My Workbins
A workbin is like a personal queue, in which you can store email and other interactions that are to be handled later.
Click the Access and use Workspace supporting views button () to display the Supporting Views menu, then select one of the following workbin views:
- My Workbins—For all agents, a view of your personal workbins.
- My Team Workbins—For Team Leads (supervisors), a view of all of the workbins that belong to agents that you supervise.
- My Interaction Queues—For Team Leads (supervisors), a filtered view of your system queues.
To view another workbin, click it in the Workbin explorer on the left-hand side of the view. The number of unopened email messages in each workbin folder is indicated next to the name of the workbin folder.
The list of available workbins depends on the configuration of your system. The default selected workbin is the first workbin in the list that is specified by your system administrator. Some of the workbins which might be configured for you include:
- In-Progress—Contains inbound email messages or other workitems that have not been processed
- Draft—Contains outbound email messages that have been saved as draft
To view details, notes, and case date about an interaction, select it. Information about the selected interaction is displayed in the tabs at the bottom of the Workbins view. To display the interaction information tabs, click the Show/Hide Details Panel button.
thumb|center
To open an interaction, double-click it.
You can perform the following functions on selected interactions in workbins by using the Workbin Actions buttons:
- Reply (link=)
- Reply All (link=)
- Open (link=)
- Mark Done (link=)
- Delete (link=)—if you have the correct permissions
- Move to Queue (link=)—if you have the correct permissions
- Move to Workbin (link=)—if you have the correct permissions
- Edit Case Information (link=)—(if you have the correct permissions) Opens the Edit Case Information window to enable you to edit the content of the Case Data tab for the selected interaction(s).
Click here for information about handling email interactions.
[+] Manage your active interaction windows by using the Interaction Bar
Manage Your Interactions
Interaction Bar
The Interaction Bar is displayed at the bottom of the Main Window whenever you have one or more active interactions. Each interaction is represented by a control bar and an Interaction Window. You can use the control bar to perform basic actions that are specific to the interaction type, such as ending a call.
500px|thumb|center|Main Window Interaction Bar
Click the control bar for an interaction to give it the focus. All other open interactions are collapsed to the Interaction Bar.
Click the small colored bar on the left of the interaction control, to toggle between pinned mode and floating mode. Each interaction can be set to pinned or floating mode independently.
In pinned mode, the interaction view is displayed in the Main Window below the Interaction Bar, and all other views, such as My Channels, are hidden. Contact view and Response view are accessible.
500px|thumb|center|Main Window Interaction Bar with a pinned interaction
In floating mode, the interaction view is displayed as a small view that is attached to the bottom of the Interaction Bar. If other interactions are currently open in pinned mode or if one the Workspace views, such as My Channels is currently displayed, they will appear dimmed behind the floating interaction view.
500px|thumb|center|Main Window Interaction Bar with a floating interaction
When you have more than one active interaction, click the interaction to display it.
If you place your mouse pointer over an interaction in the Interaction Bar, two things occur:
- A Tooltip is displayed that summarizes the content of the interaction. It includes a summary of all the interactions that are involved in this thread, as well as any consultation interactions that are related to the interaction.
- The media icon in the interaction is a button that activates when you place your mouse pointer near it. If you click the media icon, Workspace switches to that interaction without opening the interaction view.

Use the switch media button to switch media without opening the interaction view.
Entries in the Interaction Bar flash (or blink) when specific events occur that might require your immediate attention. Chat, SMS Session, and IM Interactions flash when a new message is received.
To allow for the maximum space in the Interaction Bar, when you are handling an interaction, the Team Communicator view is reduced to a button: link=
Conseil
Your system might be configured so that all interaction control bars are automatically collapsed in the Interaction Bar. This might be done to enable you to see a third party application or other content in the Main Window before or during the handling of an interaction. To display an interaction view for a collapsed interaction, click the control bar. Added: 8.5.106.19
Interaction Window
You can use the Interaction Window to handle interactions, such as a voice call or a chat. Each interaction type has its own interaction window.
- Voice Interaction—Enables you to view all of the information that is necessary to handle a voice interaction with a contact or an internal agent.
- Web Callback Interaction—Enables you to view the information that is necessary to handle a web callback voice interaction with a contact.
- Chat Interaction—Enables you to view all of the information that is necessary to handle a chat interaction with a contact or an internal agent.
- E-Mail Interaction—Enables you to view all of the information that is necessary to handle inbound and outbound email interactions with a contact or internal agent, and how to handle QA review of outbound email interactions.
- SMS Interaction—Enables you to view all of the information that is necessary to handle an SMS interaction with a contact.
- Workitems—Enables you to view non-interactive media types, such as faxes.
This video shows you how to manage the display of the interaction, the contact information and history, and the standard responses in the Interaction Window.
[+] View your messages
View Your Messages
[Modified: 8.5.100.05]
The message display is a scrollable list of changes to the status of various network components, such as Contact Server, Statistics Server, Interaction Server (for chat, email, and workitems), and your Voice switch. You can also view messages that are broadcast to you.
Click the Access and use Workspace supporting views button () to display the Supporting Views menu, then select My Messages to open the My Messages view which displays a list of messages from your system administrator or supervisor.
Workspace might be configured by your administrator to display the number of unread broadcast messages by using a "message waiting indicator" ( ) both on the Access and use Workspace supporting views button () and in the Supporting Views menu (see View and Connect to Your Voicemail Messages for more information.
[+] View and connect to your voicemail messages
View and Connect to Your Voicemail Messages
[Added: 8.5.100.05]
If your system is configured to enable you to use Workspace to retrieve your voicemail messages, a "messages waiting indicator" () is displayed on the Access and use Workspace supporting views button ().
Click to display the Supporting Views menu. Your voicemail boxes are displayed in the menu. If you have voicemail messages that you have not played, a "messages waiting indicator" () is displayed beside the name of the voicemail box.
To call your voicemail box select it from the Supporting Views menu. A new internal interaction is launched. Use the keypad to enter your authentication information.
The message waiting indicator displays the total of all unplayed and unread messages in your voicemail boxes and the My Messages view.
Conseil
If you hover your mouse pointer over the message waiting indicator, a tooltip is displayed that lists the number of messages in each of your voicemail boxes and the
My Messages view.
For information about using your voicemail boxes, refer to Connecting to your Voicemail Messages in the Workspace 8.5.1 User's Guide.
[+] Accept or reject inbound interactions by using the Interaction Preview
Interaction Preview
If a new interaction arrives at your workstation, you are notified by the Interaction Preview interactive notification, unless you are configured for auto-answer. The preview includes attached data that enables you to decide whether to accept or reject the interaction.
[+] Start an Instant Message session
[+] Participate in an Outbound campaign


