Getting started
Workspace Web Edition is your gateway for handling calls (both inbound and outbound) and other interactions, such as chat or emails.
Now that you know what Workspace Web Edition is, you’re probably wondering how to use it. This Getting Started page will get you logged on and ready to take a call. Let’s get started.
- The pictures and videos in this Help document show native Genesys Workspace. Your company might have customized many features including corporate logos and the name of the product. This document uses the name Workspace to mean the Agent Desktop application that you use to handle calls and other interactions and to manage your work and your contacts.
- The screen shots and videos show the Dashboard tab. This is available only in the Cloud version of Workspace Web Edition.
Workspace Video Tutorials
| Want quick video tutorials? See our "How To" Videos collection! |
| Check out this video about how to handle a phone call! |
Log in to Workspace
Open a browser (if you are using browser communication, use Chrome) and go to the link for Workspace that your supervisor gave you.
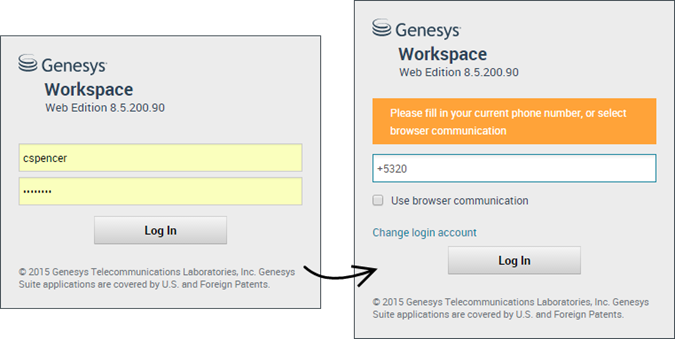
Log in with your username and password. You might also have to enter some additional information:
- If prompted, enter your phone number, place, or preferred language.
- If your system uses browser communication, select Use browser communication.
- If this is your first time logging on, you might have to change your password.
If you are not sure about any of the prompts, ask your supervisor for help.
Tip: Workspace has a security feature that might be set up for your account that logs you out if you stop using Workspace or your computer for a while. Workspace first displays a message to warn you that you are going to be logged out. If Workspace logs you out, just log back in again when you are ready to start using Workspace.
Important: You may login only to a single Workspace session at a time. You must log out of one session before logging into a new session.
Important: To log out of Workspace, you must use the Exit option from the menu in the upper right-hand corner. You won't be able to log out if you have any active calls or interactions.Place
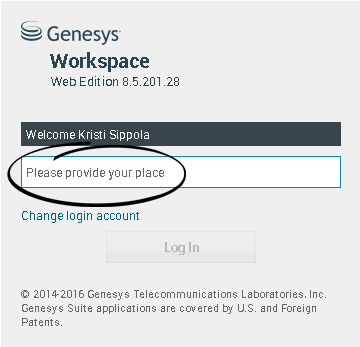
During login, you might see a window that asks you to input your Place.
Your Place is the name or number of the workstation or phone you are using. If you do not know what to enter, ask your supervisor.
If you do not see this window, your account is set up to always log you in on the same Place.
If you move around from Place to Place, you might have to enter a different Place each time that you login.
Change your status to Ready
To receive calls, you must be in a Ready status (indicated by a green checkmark beside your name).
If you need to change your status, go to My Channels and toggle the voice channel to Ready.
Tip: You can also change your status for all channels in one easy step. Click your name at the top right-hand corner of the screen and select Ready.
Watch the video for a short demonstration of changing your status.
What happens if not all channels are available when I login?
Sometimes when you login, one or more of the channels that you are assigned might not be available.
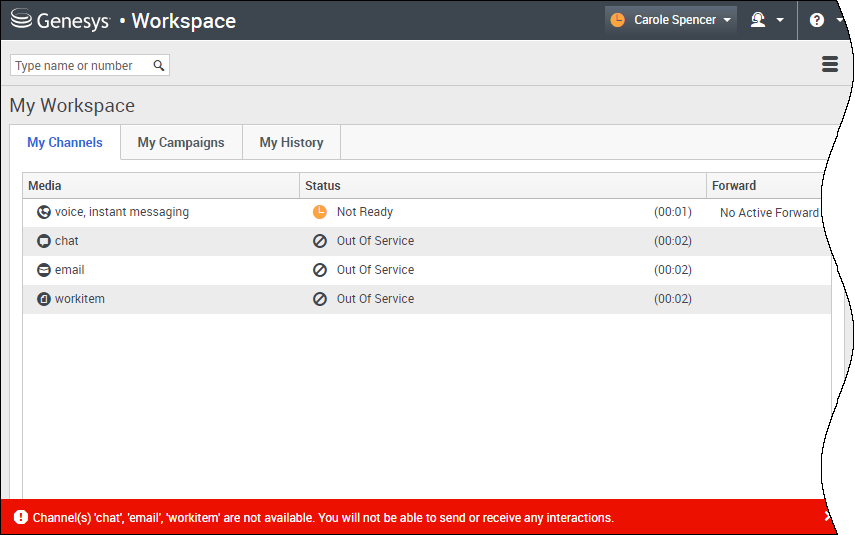
You will know that one or more channels are not available because you will see a warning message at the bottom of the Workspace window.
When this happens, you can still login, but when you look at your My Channels tab, you'll see that one or more channels have the Out Of Service status. When a channel is out of service, you cannot log on or off on that channel and you cannot set your status.
When the channel becomes available again, a message will be displayed at the bottom of the Workspace window. You can use the My Channels tab to change your status on that channel.
Setting your status to Not Ready with a Reason
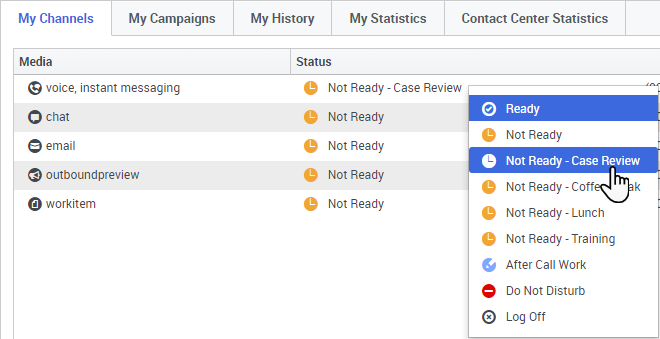
Sometimes you need to set your status on one or more channels to Not Ready so that you do not receive new interaction on that channel. You can choose to set the status to Not Ready or Not Ready with a reason. Your administrator sets up the Not Ready Reasons that are available to you from the Status drop-down menus.
Handle an inbound call
Make sure your softphone or phone device is connected and ready.
Need help with your softphone? See How do I use my web phone with Workspace?
When a call arrives, you'll get a pop-up in the bottom right-hand corner of your screen. You might also hear a sound to alert you that a call has arrived.
Click Accept to connect the call. If you Reject the call, or ignore the pop-up, it goes to the next available agent.
To get you started, here are some common call handling features:
![]() = Hold
= Hold
![]() = Resume
= Resume
![]() = Transfer
= Transfer
![]() = Mark Done
= Mark Done
After the call is complete, you might enter an After Call Work state, during which you can complete any tasks related to the call. For example, you could add a Note or select a Disposition code.
Watch the video for a short demonstration of how to handle a voice call.
What do I do next?
You might want to learn more about:
- Media channels
- Handling calls
- Working with contacts
- Using standard responses
- Managing your workbins (which store your work in progress)


